Crafting is something that you dip into now and then or it can become a lifelong passion? But the main thing to take away here is that you don’t need any special skills to paint, draw or create. The idea is to immerse yourself in the process. Whatever you create will be perfect because it was made by you.
So if you are feeling creative and really want to try your hand at making something fun and crafty or, are finding things a little difficult right now and would like a gentle, healing project to take your mind off things.
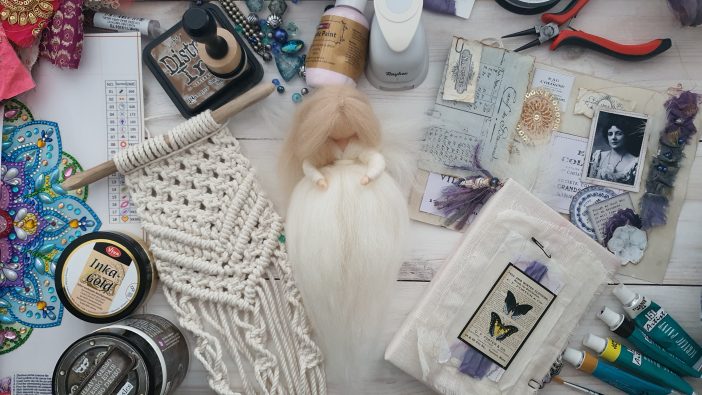
We’ve got you covered. We’ve put together this handy resource for you. At the end of the list, you’ll find photos of some of the crafts and projects I have made using the resources below.
Art and Crafts Resource List:
I have tried to include as many free courses and tutorials as possible. Not all the courses listed are free, but I have endeavored to ensure the paid courses listed are low-cost to suit all pockets.
- Aromatherapy
- Lavender Massage Oil Recipe – Our free recipe
ART
- Online Art Courses
- Charcoal Drawing with Aaron Blaise
- Ink Drawing Techniques: Brush, Nib, and Pen Style with Yuko Shimizu at skillshare.com
- New Masters Academy | fine art course
- Digital Painting 101 | FREE course
- Learn to Paint a Textured Abstract Art Painting with KR Moehr
- Learn Loose Watercolor | FREE course
- Free Classes (YouTube)
- How I Draw Faces | Updated Tutorial with Filipa – Pypah’s Art
- How to Draw a Male Eye with Darlene – RapidFireArt
- Learn how to paint a portrait in oil paint with Ben Lustenhouwer
- Tools
- Blogs and Inspiration
Bead Weaving and Jewelry Making
- Tools and How-tos
- Free Classes (YouTube)
- Beautiful Wirework Jewelry – Free Class
- Beaded Lace Necklace – Tutorial
- Bronzepony Beaded Jewelry – Tutorials
- Manualidades y Entretenimientos – Tutorials
- Milla’s Beading – Tutorials
- Spoilt Rotten Beads – Tutorials
- Free Patterns
- Just Let Me bead
- Around the Beading Table – Deb Roberti
Candle Making
- Tools
- Free How-tos and Classes
- Candle Making Demo Course | Nearly Free Course
- Nature’s Garden Free Candle Classes | Written Tutorials
Fiber Art and Yarn Crafts
-
Needle felting
- Free Projects
- How to Needle Felt a Bird – Tutorial
- Needle Felting for Beginners: Make a Sweet Felted Bowl – Tutorial
- Free Projects
-
Knitting and Crochet
- Free Classes
- Free Patterns And Tutorials
- Learn To Knit – Tutorial
- Free Knitting Patterns
- Crochet Basics – Tutorial
- Macrame
-
Weaving
- Information and Buying Guides
- Free Patterns And Tutorials
- Free Weaving Patterns – 20+ Free Weaving Patterns
-
Spinning
- Information and Buying Guides
Paper Crafts
-
Scrapbooking and Journal Making
- Free Classes (YouTube)
- Tracie Fox LoveJunk Journals – Tutorials
- Attic Lane – Tutorials
- Crafty Cat – Tutorials
- Scrapbooking With ME Crafts – Tutorials
- Mrs Cog – Tutorials
- nessies journals – Tutorials
- The Graphics Fairy LLC – Tutorials
- 49dragonflies – Tutorials
- Harvinaisenkauniselama – Tutorials
- Free Resources for Images
- Pintables you can buy on Etsy that don’t cost the earth:
- My Porch Prints Printable kits – Printables
- Free Classes (YouTube)
- Decoupage
- Paper Making and Dying
- Embossing
Pottery
- Tools
Sewing
- Free Classes
- The Midnight Quilt Show – Quilting Classes
- Free Patterns and Projects
- Free Patterns – 70+ Free Sewing Patterns
- Free Sewing Class – Bag-Making Basics
Soap Making
Craft as a Therapy
- Studies
- The Influence of Art Making on Anxiety: A Pilot Study –Taylor & Francis Online
- The Connection Between Art, Healing, and Public Health: A Review of Current Literature – PubMed
- Reclaiming and Proclaiming the Use of Crafts in Occupational Therapy – The Open Journal of Occupational Therapy
- What is the evidence on the role of the arts in improving health and well-being? – World Health Organization
More Online Courses and Classes
- NC State University has online classes (via zoom) for all levels and abilities.
- Class Bento – lots of craft classes with prices clearly listed.
My Favorite Crafts and Hobbies
Below are all the crafts that I have tried from the resource list
Illustration
I’ve always loved painting and drawing. You may have noticed a few of my illustrations dotted around Comfy Zen. I am a digital illustrator, mostly producing book covers. You can grab some free art on my printables page if you wish.
Diamond Painting
Diamond Painting is quite a new craft, it’s only been around for a few years but it’s enormously popular. If you already like cross-stitch or painting by numbers, you’ll love diamond painting.
Some kits require you to fill the entire canvas to complete the project, but the kit shown above is a partial kit that I recently completed. It has an inked background to which lots of diamonds (or drills) are added.
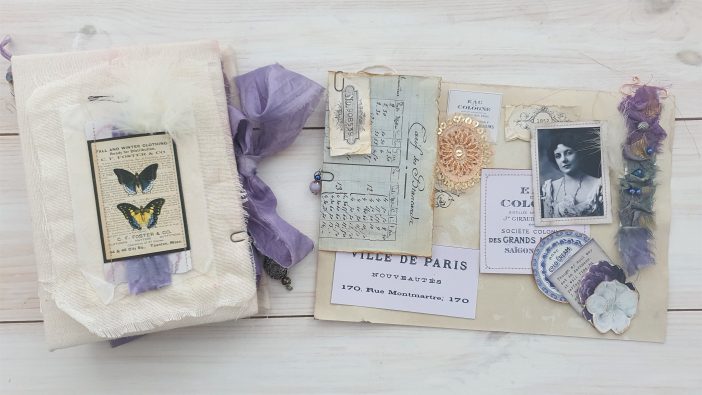
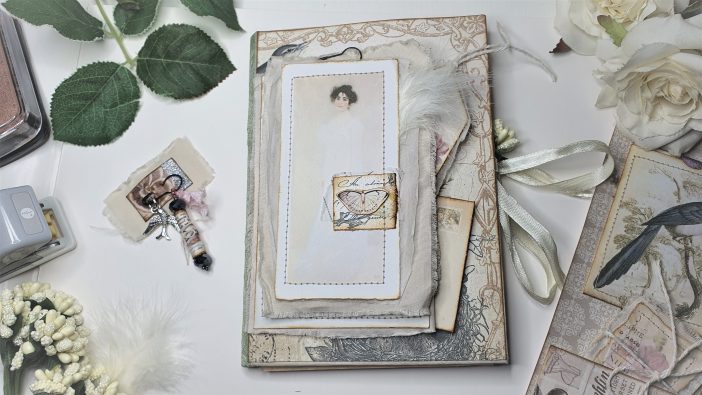
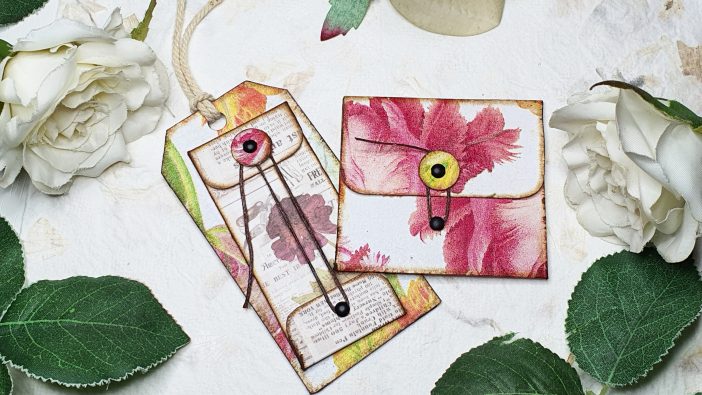
Scrapbooking
Journal-making is my latest passion. You can see the one I’m working on right now below.
Macramé
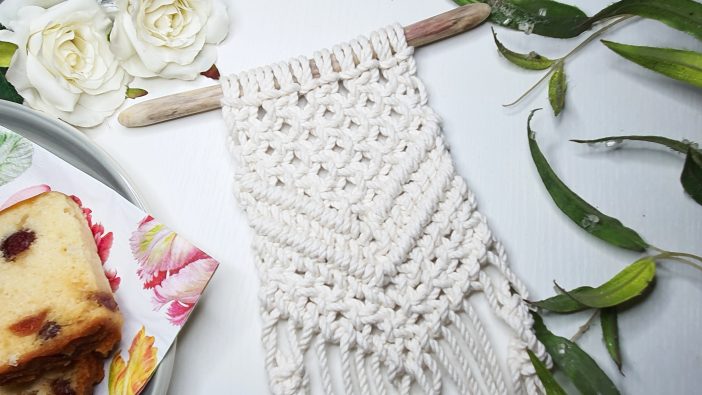
The most popular craft of the 1970s is back! But there’s nothing out of date about this new trend. So if you’d like to try your hand at making something boho-chic and contemporary with fiber, this is the craft for you.
I highly recommend you start with a macramé kit (similar to the one I made the wall hanging with, above). I also recommend you choose a kit that also comes with video instructions if possible.
Speaking of videos… Here is a macramé feather that I made.
Needle Felting
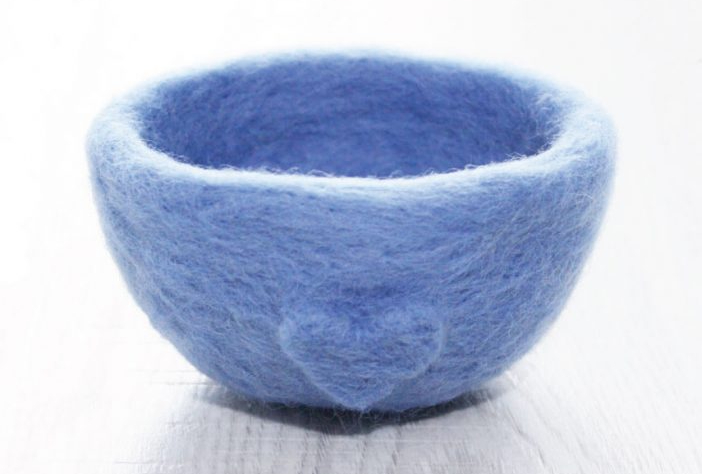
Needle felting is a fabulous way to express your creativity.
There are two basic processes:
- Wet Felting | This process uses water, soap, and agitation to tangle and shape the fibers.
- Dry felting | This is the process of tangling together the loose fibers of wool roving with a barbed needle. Poking the fibers multiple times compacts the fibers to create structure and form.
I’ve posted a tutorial here on Comfy Zen for the sweet needle-felted bowl, that you can see above. And we also have a tutorial on how to make a mid-century modern bird.
The angel, which you can see in the top image is my latest project. It was my first attempt and it was honestly so quick and easy to make.
I’ll post how to make one very soon.
Aromatherapy
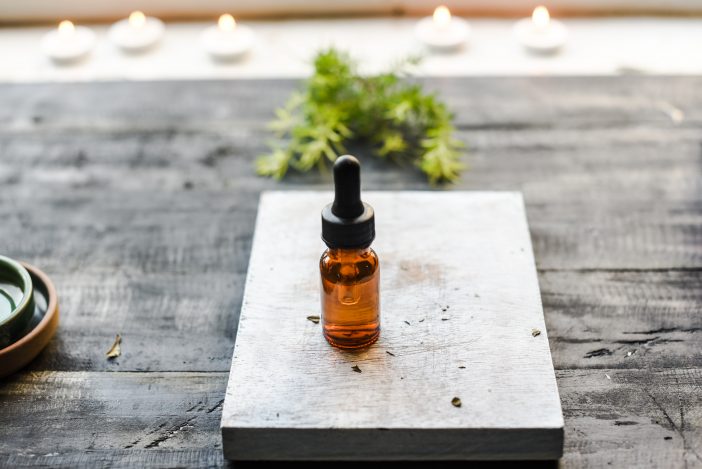
Aromatherapy is a wonderfully interesting subject to study. Especially if you are a true lover of nature and feel and sense of peace being around plants, and herbs.
I was inspired to learn more about aromatherapy after watching a wonderful BBC documentary called The Frankincense Trail several years ago. It’s well worth a watch.
I only make very basic and safe recipes.
Here is a free recipe for Lavender Massage Oil to get you started. And if you what to know more about this sweet plant, here’s an article about the use of lavender for sleep.
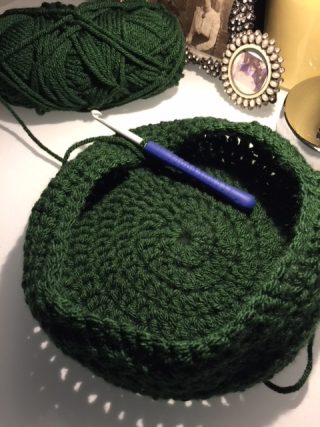
Crochet and Knitting
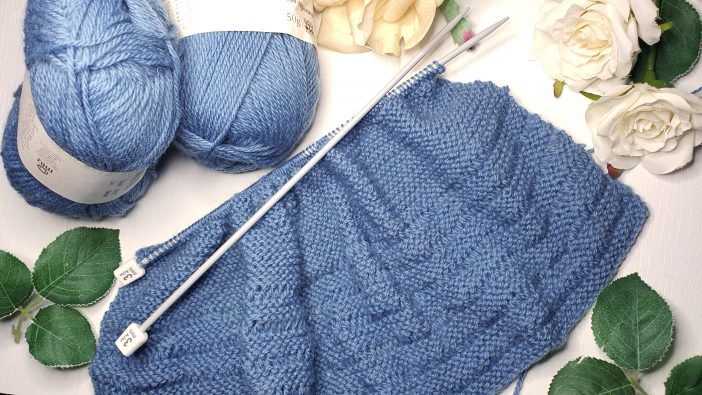
Ok, so knitting is not my strong point. And while I’d absolutely love to be able to knit, frankly I find it a bit frustrating. I have to concentrate 100% or I just drop stitches.
And it takes me about an hour each time, (not to mention, various illustrated diagrams, and a YouTube tutorial or two) to work out how to pick it up again.
But that’s probably just me. Both my mother and grandmother knitted beautifully (that’s actually my grandmother in the photo, right).
Above is my attempt at a lovely simple free pattern from the resource list above.
The dark green hat was crocheted just following a simple tutorial I found on YouTube. It actually turned out really well.
Decoupage
Paper Dying
I just wanted to quickly add this one in because I’ve been doing a lot of paper-dying lately for my journals.
And it’s a super easy and fast way to get very unique, pretty paper to make into journals notebooks, or to use to wrap small gifts.
You’ll just need a shallow tray large enough to fully immerse your paper in. It’s not an exact science – well actually it probably is, but I’m not going to pretend to be an expert. I basically just wing it when making mine (I love the surprise).
Generally speaking, the longer you soak the paper and the more concentrated the dye, the deeper or brighter the result will be. Here are my most successful recipes:
Avocado | Boil avocado (skins only) and the stones in some water. I tend to leave it overnight. Soak the paper for up to an hour (if it’s not delicate paper).
The results will be a surprisingly soft pink.
Red Onion Skins | Outer paper skin only – same process as above.
The results will be a surprisingly a soft green.
Kool-Aid or squash concentrate | OK so saying “this is hand-dyed Kool-Aid paper” doesn’t sound as sophisticated as “this is hand-dyed avocado paper” but it totally works.
I used blackcurrant and apple concentrate straight out of my kitchen cupboard. The paper came out a lovely soft pink and smelled divine for about a week. I worried it would eventually smell off, but it doesn’t, after several weeks it doesn’t smell of anything.
Do you enjoy a craft that you think we should add to this list? Tell us about it in the comments below and we’ll add it and give you a mention if you’d like.
Leave a Reply