• Skip to primary navigation
  • Skip to main content
  • Skip to primary sidebar
  • Skip to footer

Comfy Zen

for interior design enthusiasts

  • Home Décor
  • Home Furnishings
  • Crafts
  • About Us

Crafts

Get ready to unleash your creativity with our crafts selection! From DIY projects to handmade gift ideas, we've got you covered. Whether you're a seasoned crafter or just starting out, we have something for everyone. So grab your glue gun and let's get crafting!

Easy Coffee Cinnamon & Honey Soap Recipe – Melt & Pour

May 17, 2022 by Comfy Zen Leave a Comment

Coffee Cinnamon & Honey Soap top image

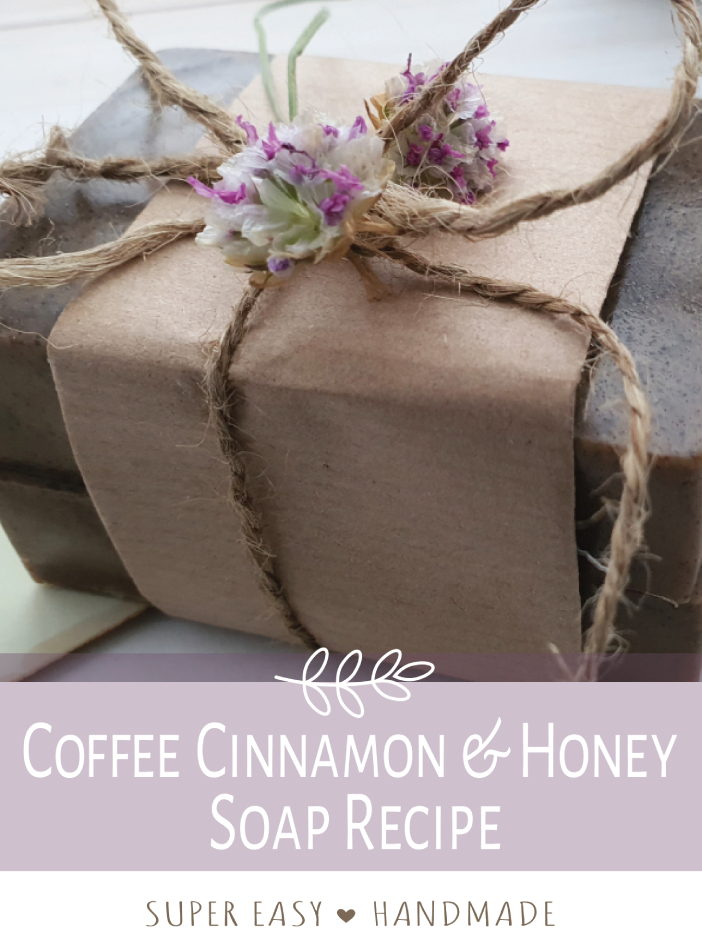
I use only honey-sweetened coffee grounds and just a teaspoon of cinnamon powder to scent this soap, so my Easy Coffee Cinnamon & Honey Soap Recipe is about as natural as you can get – and it smells heavenly.

What’s more, with this recipe you won’t need any coloring whatsoever, the coffee does it naturally all by itself!

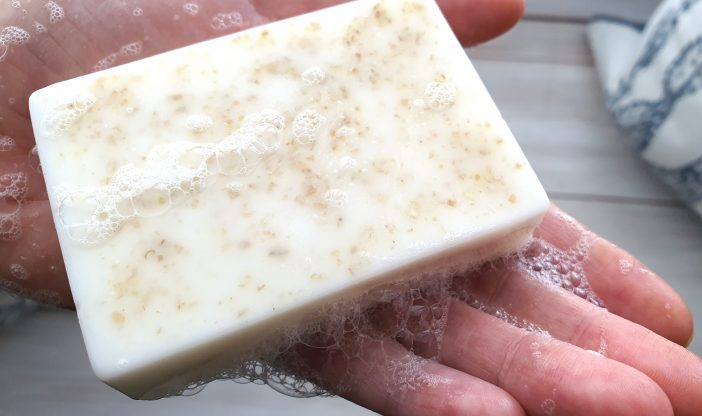
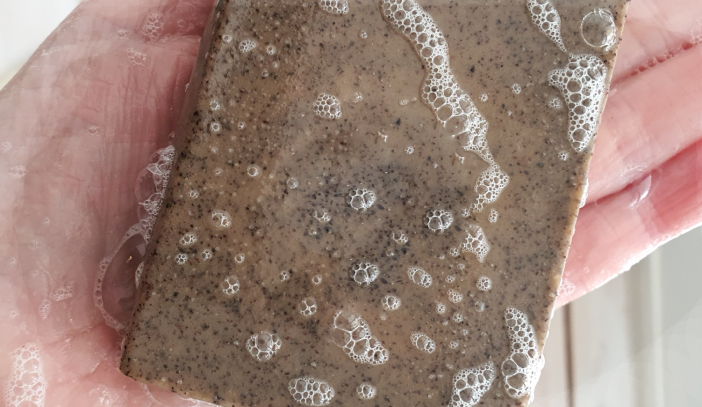
For this recipe, I used my favorite goat’s milk melt and pour soap base, and while goat’s milk doesn’t typically give too much lather, it does give just the right amount to leave your skin feeling thoroughly cleansed. It’s also very moisturizing as well as incredibly gentle on the skin (see my photo of the lather below).

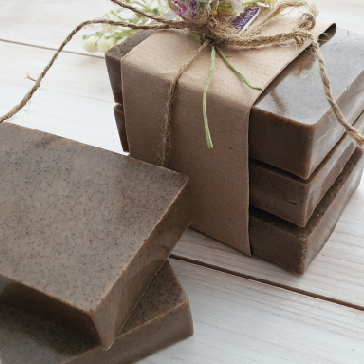
I think this long-lasting Coffee Cinnamon & Honey Soap would make a lovely hand soap to keep by your kitchen sink thanks to its delicate coffee scent and vintage/rustic aesthetic – although it’s also just as suitable for the bath and shower too!

For this recipe, I will be using just 1/2lb of melt and pour soap base. This will make approximately 5 bath-soap-sized bars (measuring approximately 3.1″ x 2.2″ x 1″ and weighing 3.4 oz).

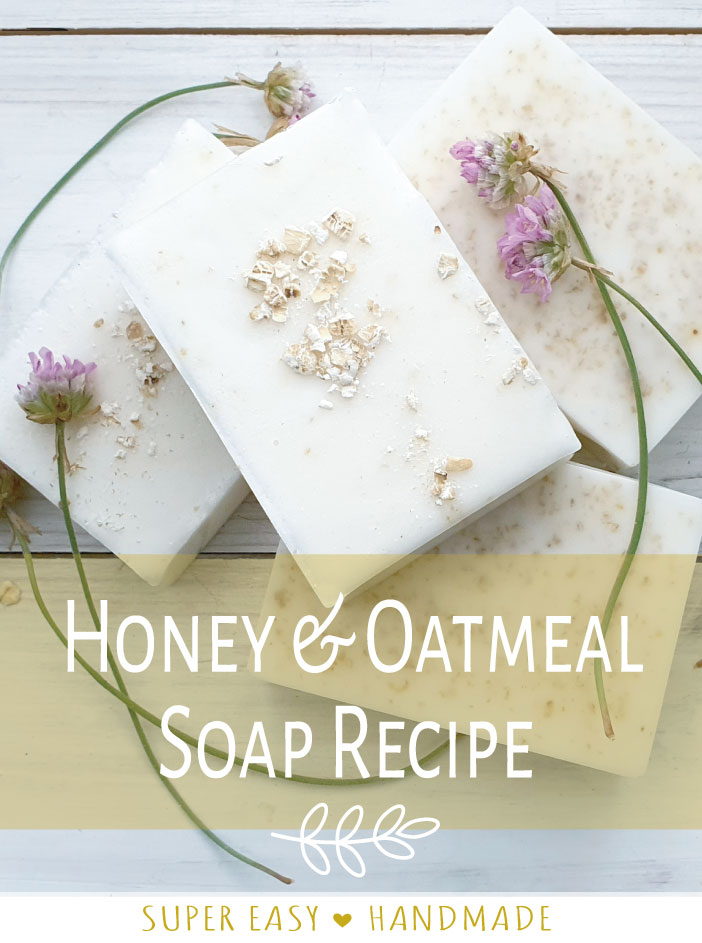
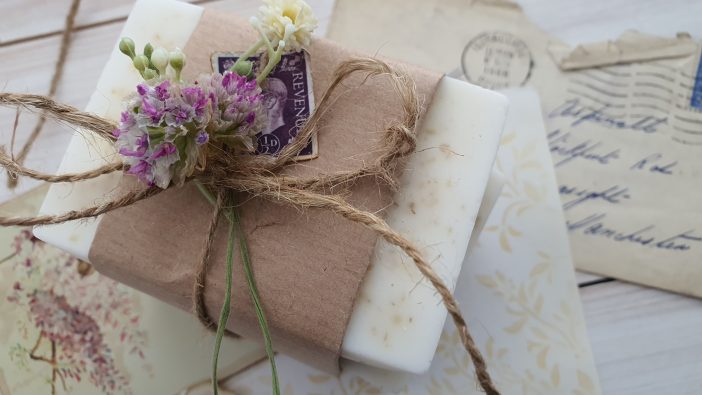
Soap bases usually come in weights of 1lb or more, so you can easily double the recipe if you like, or why not try out my favorite Super-Easy Homemade Honey & Oatmeal Soap Recipe as well.

Just so you know, using the melt and pour method means that you won’t be using any of the harsh chemicals that you would if you were to use the lye process to make soap from scratch – that’s because the saponification process has already been done for you. If you would like a little more information on the difference between this method and making soap from scratch, or, if you fancy choosing a soap-making kit, please click here.

Coffee Cinnamon & Honey Soap - pin

RECIPE VARIATIONS

Fragrance – If you would like your soap to have a stronger scent you can add coffee essential oil and or vanilla – although I honestly prefer this soap without. The scent when following my recipe is delicate and more natural.

Adding honey to the coffee grounds sweetens the scent of the coffee grounds perfectly and the cinnamon gives the soap a cozy hint of warmth.

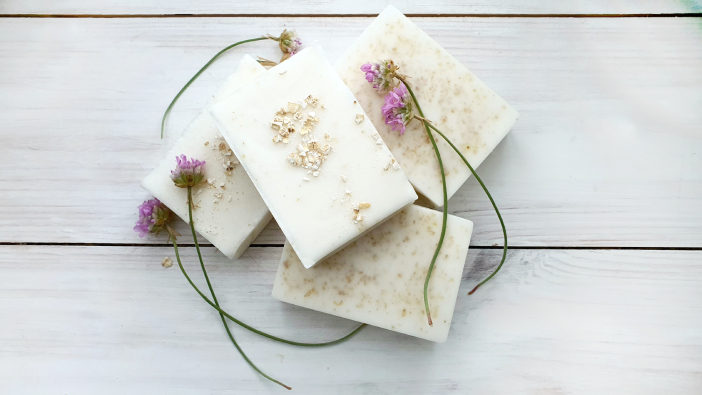
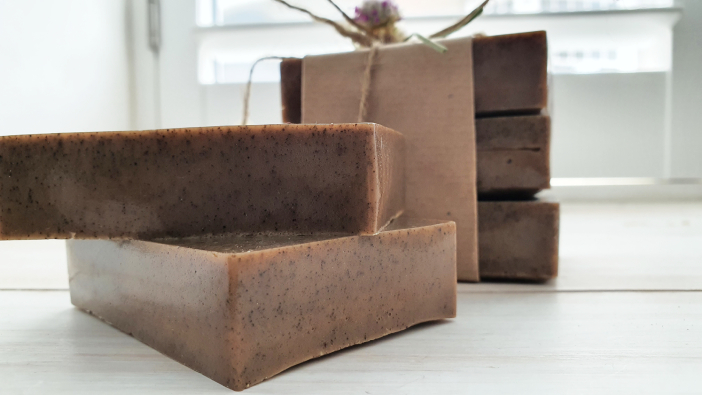
Color – The recipe doesn’t require any additional coloring whatsoever. The all-natural color of this soap is a rich, even chocolatey brown throughout – just from the coffee and a small amount of cinnamon alone.

Cinnamon – This ingredient may be left out if you prefer, it won’t affect the recipe.

Oils – I added extra virgin olive oil to my mixture as it’s my favorite, but the recipe will work just as well with another oil of your choice.

Base – This recipe uses a goat’s milk soap base which is just so creamy and silky smooth, not to mention, very gentle for sensitive skin. But you can substitute it for a different melt and pour base if you wish.

Rubbing Alcohol – A small spritz of isopropanol alcohol (rubbing alcohol) is used to eliminate any bubbles that may form on the top of your soap. If you don’t wish to use this ingredient, the soap will be perfectly fine but may look a little less than neat.
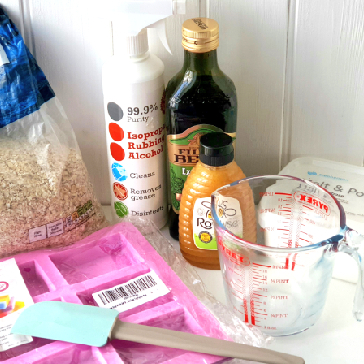
Coffee Cinnamon & Honey Soap - Recipe
Coffee Cinnamon & Honey Soap has a nice even color throughout.
Coffee Cinnamon & Honey Soap - Lather
This is the amount of lather this Coffee Cinnamon & Honey Soap recipe gives you using a goat’s milk base.

INGREDIENTS

  • 1/2 lb Goat’s Milk Soap Base
  • Silicone Soap Mold (this set also contains a spatula)
  • Spatula
  • Glass Jug
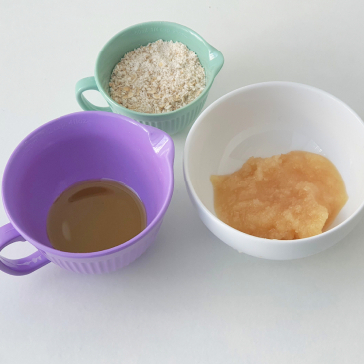
  • 1/4 Cup of Used Coffee Grounds
  • 2 tbsps Honey
  • 1 1/2 tbsp Extra-Virgin Olive Oil
  • 1 tsp Ground Cinnamon
  • Rubbing Alcohol (Spray)

Method

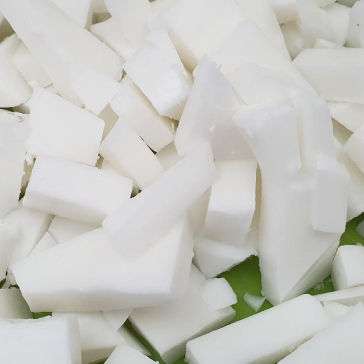
  1. Cut the soap base into roughly 1-inch-sized cubes. (The soap base can easily be cut with an ordinary kitchen knife.)
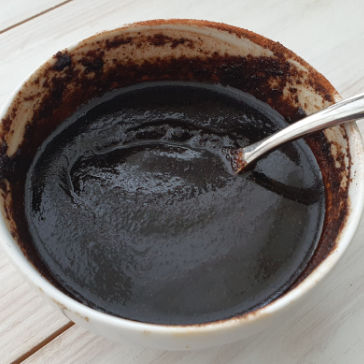
  2. In a small dish or bowl mix the used coffee grounds with the honey and cinnamon (if used). Warm the honey in the microwave a little if needed to help mix it with the grounds.
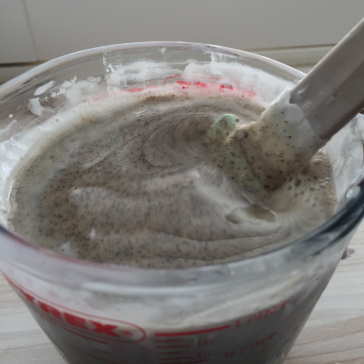
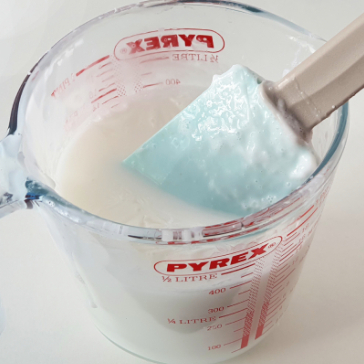
  3. Place the soap base cubes in a glass jug, and heat in the microwave until all of the cubes melt. Be careful not to overheat the soap base. You should melt the cubes in short bursts and stir in between heating times.
  4. Add the coffee mixture and extra-virgin olive oil and stir well.
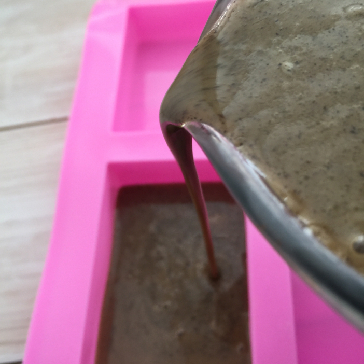
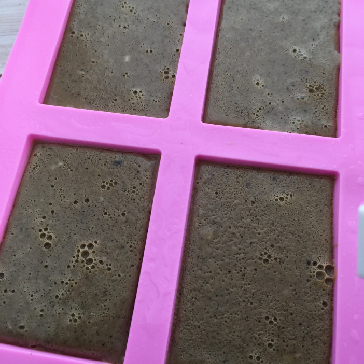
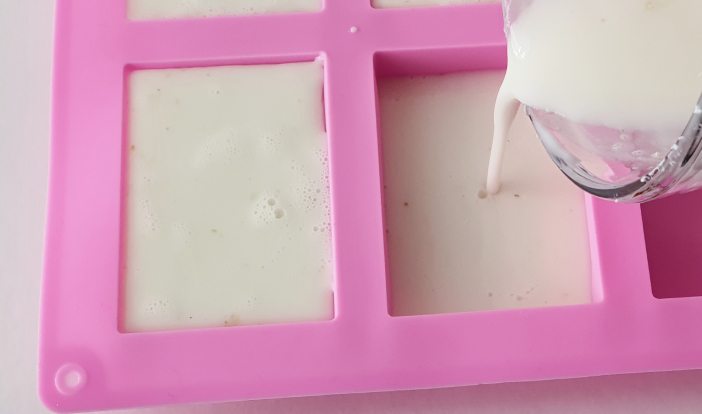
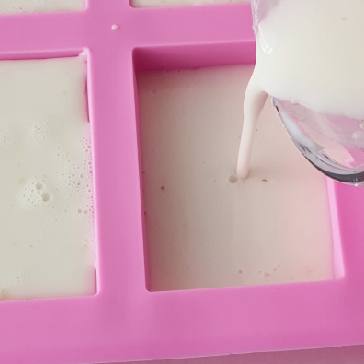
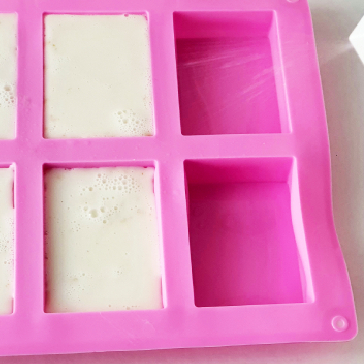
  5. Pour equally into the silicone mold.
  6. Lightly spray the surface of the soap with rubbing alcohol to eliminate any bubbles.
  7. Allow the soap to cool and set by leaving it undisturbed for approximately two hours.
  8. When the soap is set, carefully turn out the soaps from the mold. Don’t worry soap molds are thin which makes this process very easy.

And that’s it… easy wasn’t it?

Photos of the Process

Goat's milk soap base
Cutting the soap base.

Coffee Cinnamon & Honey mixture for soap recipe
Coffee grounds, cinnamon, and honey. You can add the extra virgin olive oil to this mixture too.

Coffee Cinnamon & Honey Soap melt and pour recipe
Add the coffee mixture to the melted soap base and stir well.

Coffee Cinnamon & Honey Soap pouring into the mold.
Pour evenly into your silicone molds.

Coffee Cinnamon & Honey Soap - home made
Spray the surface lightly with Isopropanol Alcohol to remove bubbles.

Coffee Cinnamon & Honey Soap
Leave to set for approximately 2 hours before turning out of the mold.

Filed Under: Crafts, Featured

Super-Easy Homemade Honey & Oatmeal Soap Recipe – Melt and Pour

May 12, 2022 by Comfy Zen Leave a Comment

Honey & Oatmeal Soap Recipe -pin

Today I’d like to share my favorite, super-easy, homemade honey, and oatmeal soap recipe with you. One of the best things about this recipe is that it doesn’t feel like a typical grocery store soap. Made with a goat’s milk soap base, the scent is delicate, and natural and the consistency is soft and smooth. It also lasts a long time and has a lovely lather (see photo below) – so it’s perfect for a bath or shower!

RECIPE VARIATIONS

You can leave out either the oatmeal or the honey if you wish – the recipe still works. I used porridge oats that I blitzed in my Nutribullet for just a couple of seconds so that some of the flakes remained.

Color and Fragrance – You can customize this soap recipe by adding a couple of drops of essential oil, and a little coloring – although I honestly prefer this soap without.

Oils – I added extra virgin olive oil to my mixture as it’s my favorite goto skincare oil, (I even use olive oil as a natural body moisturizer), but do feel free to substitute with any oil of your choice.

Base – The recipe calls for a goat’s milk soap base which gives the soap a soft, creamy texture that is very gentle on sensitive skin but you can use any melt and pour base that you prefer.

Rubbing Alcohol – This is used to eliminate any bubbles that may form on the top of your soap. If you don’t wish to use it the soap will be OK but may look a little less than neat.

Honey & Oatmeal Soap vintage
Packaged with brown paper and string, this old-fashioned homemade Honey & Oat Soap recipe makes a lovely vintage-style gift.

This recipe will make four bath-soap-sized bars (measuring approximately 3.1″ x 2.2″ x 1″ and weighing 3.4 oz) – using just 1lb of goat’s milk melt and pour soap base. You can easily double the recipe if you wish.

Just so you know, the bases are commonly 2lbs and more but I prefer to make smaller batches at a time when making soap just for myself and my family unless I’m making extra for gifting, see above.

And I thought it might be a good idea to give you the recipe for a smaller quantity so that you’ll have plenty of soap base left over to try out my Easy Coffee Cinnamon & Honey Soap Recipe or make more of this honey & oat soap when you run out.

Honey & Oatmeal Soap lather
Goat’s milk doesn’t typically have much lather, but this soap recipe lathers nicely.

If you’d like a little more information on the melt and pour method v’s the lye process or if you fancy choosing a soap-making kit, please click here.

INGREDIENTS

  • 1/2 lb Goat’s Milk Soap Base
  • Silicone Soap Mold (this set also contains a spatula)
  • Spatula
  • Glass Jug
  • 1 tbsp Honey
  • 1 tbsp Extra-Virgin Olive Oil
  • 1 tbsp Porridge Oats (ground) or Oatmeal (not course or steel-cut as it could be sharp)
  • Rubbing Alcohol (Spray)

Method

pouring the soap base into the mold
  1. Cut the soap base into roughly 1-inch-sized cubes. (The soap base is quite easy to cut with an ordinary kitchen knife.)
  2. Place the cubes in a glass jug, and heat in the microwave until all of the cubes melt. Be careful not to overheat the soap base. You should melt the cubes in short bursts and stir in between heating times.
  3. Now add the oats, honey, and oil and stir well.
  4. Pour evenly into the silicone mold.
  5. Lightly spray the surface of the soap with rubbing alcohol to eliminate any bubbles. (The bubbles may not disappear immediately but don’t worry, they will have by the time the soap is set).
  6. Sprinkle a few flakes of oats on the top for decoration if you wish.
  7. Allow the soap to cool and set by leaving it undisturbed for approximately two hours.
  8. When the soap is set, carefully turn out the soaps from the mold. Don’t worry soap molds are thin which makes this process very easy.

And that’s it all done – enjoy your soap!

Ohh and if you need some pretty handmade labels to package your soap, I have some free printable ones here.

Home made Honey & Oatmeal Soap

Photos of the Process

Ingredients.
Ingredients.

Cutting the soap base.

Extra-virgin olive oil, oats, and honey.

Melted soap base
Melted soap base.
Melted soap base
Pour the mixture into the silicone mold.

Spraying the Soap with Rubbing Alcohol

Finished saop

Filed Under: Crafts, Featured

How to Use a Heat Gun for Embossing

April 17, 2021 by Comfy Zen Leave a Comment

If you are new to embossing, here is a quick how-to guide to get you started. In this case, we’ll take you through the process of heat embossing on paper or card stock, but you can emboss a variety of other materials too, including ceramics, fabrics, glass, and wood.

The process for embossing on paper is very straightforward and fun to learn, and when you feel confident you can try hand-drawing your own designs or even make your own stamps. The first thing you’ll need is a heat gun. I have written a buying guide for that.

Just so you know you will need a heat gun, a hairdryer wont reach the temperature required to melt the embossing powder. It’s more likely to blow the powder everywhere than to give you the results you want.

Here are the other tools you need to get started:

  • Card or paper stock
  • An anti-static pouch
  • A stamp or embossing pens
  • A VersaMark Watermark Ink Pad
  • Embossing powder

First, lightly rub your anti-static pouch over your card stock.

If you are using a stamp, load your stamp using your pigment Inkpad. Stamp the design onto your card or paper stock.

Coat the area you have stamped with your embossing powder, tipping away excess powder onto a spare sheet of paper. If you do this you’ll find that you can easily funnel/pour it back into the powder pot for reuse.

Check that there are no stray particles on your card. You can use a fine paintbrush to make sure everything looks neat and tidy.

VersaMark Watermark Ink Pad

Now it’s time to set the embossing powder with your heat gun using circular motions. After a few seconds, you will start to see the embossed effect appear.

You can also use embossing pens to hand-draw your own design. Just remember to use the anti-static pad first. Once you have drawn out your image, the process is the same as above.

And that’s it, very simple but very effective.

Filed Under: Crafts

The Big Bumper List of Creative Hobbies and Craft Ideas

January 11, 2021 by Comfy Zen Leave a Comment

Stuff I’ve been working on recently.

Crafting is something that you dip into now and then or it can become a lifelong passion? But the main thing to take away here is that you don’t need any special skills to paint, draw or create. The idea is to immerse yourself in the process. Whatever you create will be perfect because it was made by you.

So if you are feeling creative and really want to try your hand at making something fun and crafty or, are finding things a little difficult right now and would like a gentle, healing project to take your mind off things.

We’ve got you covered. We’ve put together this handy resource for you. At the end of the list, you’ll find photos of some of the crafts and projects I have made using the resources below.

Art and Crafts Resource List:

I have tried to include as many free courses and tutorials as possible. Not all the courses listed are free, but I have endeavored to ensure the paid courses listed are low-cost to suit all pockets.

  • Aromatherapy
    • Lavender Massage Oil Recipe – Our free recipe

ART

  • Online Art Courses
    • Charcoal Drawing with Aaron Blaise
    • Ink Drawing Techniques: Brush, Nib, and Pen Style with Yuko Shimizu at skillshare.com
    • New Masters Academy | fine art course
    • Digital Painting 101 | FREE course
    • Learn to Paint a Textured Abstract Art Painting with KR Moehr
    • Learn Loose Watercolor | FREE course
  • Free Classes (YouTube)
    • How I Draw Faces | Updated Tutorial with Filipa – Pypah’s Art
    • How to Draw a Male Eye with Darlene – RapidFireArt
    • Learn how to paint a portrait in oil paint with Ben Lustenhouwer
  • Tools
    • Best Screen Printing Kit
  • Blogs and Inspiration
    • ChrisOatley.com

Bead Weaving and Jewelry Making

  • Tools and How-tos
    • Best Bead Loom (for Easy Beautiful Bracelets and More)
    • How to Finish a Beaded Bracelet (On or off Loom)
  • Free Classes (YouTube)
    • Beautiful Wirework Jewelry – Free Class
    • Beaded Lace Necklace – Tutorial
    • Bronzepony Beaded Jewelry – Tutorials
    • Manualidades y Entretenimientos – Tutorials
    • Milla’s Beading – Tutorials
    • Spoilt Rotten Beads – Tutorials
  • Free Patterns
    • Just Let Me bead
    • Around the Beading Table – Deb Roberti

Candle Making

  • Tools
    • The Best Candle-Making Kit
  • Free How-tos and Classes
    • Candle Making Demo Course | Nearly Free Course
    • Nature’s Garden Free Candle Classes | Written Tutorials

Fiber Art and Yarn Crafts

  • Needle felting
    • Free Projects
      • How to Needle Felt a Bird – Tutorial
      • Needle Felting for Beginners: Make a Sweet Felted Bowl – Tutorial
  • Knitting and Crochet
    • Free Classes
      • Knit-Along: Socks
    • Free Patterns And Tutorials
      • Learn To Knit – Tutorial
      • Free Knitting Patterns
      • Crochet Basics – Tutorial
  • Macrame
    • Free Macrame Feather Pattern with Video
    • Best Macrame Kits (for Easy Chic Projects You’ll Love)
  • Weaving
    • Information and Buying Guides
      • Best Looms for Beginners
      • Best Rigid Heddle Loom
      • Cricket Loom Tips
    • Free Patterns And Tutorials
      • Free Weaving Patterns – 20+ Free Weaving Patterns
  • Spinning
    • Information and Buying Guides
      • Best Spinning Wheel

Paper Crafts

  • Scrapbooking and Journal Making
    • Free Classes (YouTube)
      • Tracie Fox LoveJunk Journals – Tutorials
      • Attic Lane – Tutorials
      • Crafty Cat – Tutorials
      • Scrapbooking With ME Crafts – Tutorials
      • Mrs Cog – Tutorials
      • nessies journals – Tutorials
      • The Graphics Fairy LLC – Tutorials
      • 49dragonflies – Tutorials
      • Harvinaisenkauniselama – Tutorials
    • Free Resources for Images
      • publicdomainpictures.net
      • pixabay.com
      • thegraphicsfairy.com
      • picryl.com
    • Pintables you can buy on Etsy that don’t cost the earth:
      • My Porch Prints Printable kits – Printables
  • Decoupage
    • Free printables for decoupage projects
  • Paper Making and Dying
    • Tips and a recipe below
  • Embossing
    • Best Heat Gun for Crafts
    • How to Use a Heat Gun for Embossing

Pottery

  • Tools
    • Best Pottery Wheel

Sewing

  • Free Classes
    • The Midnight Quilt Show – Quilting Classes
  • Free Patterns and Projects
    • Free Patterns – 70+ Free Sewing Patterns
    • Free Sewing Class – Bag-Making Basics

Soap Making

  • Soap Making Kits

Craft as a Therapy

  • Studies
    • The Influence of Art Making on Anxiety: A Pilot Study –Taylor & Francis Online
    • The Connection Between Art, Healing, and Public Health: A Review of Current Literature – PubMed
    • Reclaiming and Proclaiming the Use of Crafts in Occupational Therapy – The Open Journal of Occupational Therapy
    • What is the evidence on the role of the arts in improving health and well-being? – World Health Organization

More Online Courses and Classes

  • NC State University has online classes (via zoom) for all levels and abilities.
  • Class Bento – lots of craft classes with prices clearly listed.

My Favorite Crafts and Hobbies

Below are all the crafts that I have tried from the resource list

Illustration

I’ve always loved painting and drawing. You may have noticed a few of my illustrations dotted around Comfy Zen. I am a digital illustrator, mostly producing book covers. You can grab some free art on my printables page if you wish.

My Artwork

Diamond Painting

Diamond Painting Kit  Comfy Zen

Diamond Painting is quite a new craft, it’s only been around for a few years but it’s enormously popular. If you already like cross-stitch or painting by numbers, you’ll love diamond painting. 

Some kits require you to fill the entire canvas to complete the project, but the kit shown above is a partial kit that I recently completed. It has an inked background to which lots of diamonds (or drills) are added.

Scrapbooking

Journal-making is my latest passion. You can see the one I’m working on right now below.

This image has an empty alt attribute; its file name is 20210213_151632-702x395.jpg
Journal making – You can see examples of the ephemera I have started to add to my page layout (right).
This image has an empty alt attribute; its file name is cover-book-702x395.jpg
Another of my handmade journals

Macramé

macrame wall hanging kit  Comfy Zen

The most popular craft of the 1970s is back! But there’s nothing out of date about this new trend. So if you’d like to try your hand at making something boho-chic and contemporary with fiber, this is the craft for you.

I highly recommend you start with a macramé kit (similar to the one I made the wall hanging with, above). I also recommend you choose a kit that also comes with video instructions if possible.

Speaking of videos… Here is a macramé feather that I made.

Needle Felting

sweet needle felted bowl  Comfy Zen
Needle felt bowl

Needle felting is a fabulous way to express your creativity.

There are two basic processes:

  • Wet Felting | This process uses water, soap, and agitation to tangle and shape the fibers.
  • Dry felting | This is the process of tangling together the loose fibers of wool roving with a barbed needle. Poking the fibers multiple times compacts the fibers to create structure and form.

I’ve posted a tutorial here on Comfy Zen for the sweet needle-felted bowl, that you can see above. And we also have a tutorial on how to make a mid-century modern bird.

The angel, which you can see in the top image is my latest project. It was my first attempt and it was honestly so quick and easy to make.

I’ll post how to make one very soon.

Aromatherapy

This image has an empty alt attribute; its file name is anshu-a-7n5_0j7b7Hg-unsplash-702x469.jpg

Aromatherapy is a wonderfully interesting subject to study. Especially if you are a true lover of nature and feel and sense of peace being around plants, and herbs.

I was inspired to learn more about aromatherapy after watching a wonderful BBC documentary called The Frankincense Trail several years ago. It’s well worth a watch.

I only make very basic and safe recipes.

Here is a free recipe for Lavender Massage Oil to get you started. And if you what to know more about this sweet plant, here’s an article about the use of lavender for sleep.

Crochet and Knitting

This image has an empty alt attribute; its file name is 20210110_213339-2-1-702x395.jpg
This image has an empty alt attribute; its file name is IMG_2021-320x427.jpg

Ok, so knitting is not my strong point. And while I’d absolutely love to be able to knit, frankly I find it a bit frustrating. I have to concentrate 100% or I just drop stitches.

And it takes me about an hour each time, (not to mention, various illustrated diagrams, and a YouTube tutorial or two) to work out how to pick it up again.

But that’s probably just me. Both my mother and grandmother knitted beautifully (that’s actually my grandmother in the photo, right).

Above is my attempt at a lovely simple free pattern from the resource list above.

The dark green hat was crocheted just following a simple tutorial I found on YouTube. It actually turned out really well.

Decoupage

Decoupage tag and envelope Comfy Zen
Decoupaged envelop and tag.

Paper Dying

I just wanted to quickly add this one in because I’ve been doing a lot of paper-dying lately for my journals.

And it’s a super easy and fast way to get very unique, pretty paper to make into journals notebooks, or to use to wrap small gifts.

You’ll just need a shallow tray large enough to fully immerse your paper in. It’s not an exact science – well actually it probably is, but I’m not going to pretend to be an expert. I basically just wing it when making mine (I love the surprise).

Generally speaking, the longer you soak the paper and the more concentrated the dye, the deeper or brighter the result will be. Here are my most successful recipes:

Avocado | Boil avocado (skins only) and the stones in some water. I tend to leave it overnight. Soak the paper for up to an hour (if it’s not delicate paper).

The results will be a surprisingly soft pink.

Red Onion Skins | Outer paper skin only – same process as above.

The results will be a surprisingly a soft green.

Kool-Aid or squash concentrate | OK so saying “this is hand-dyed Kool-Aid paper” doesn’t sound as sophisticated as “this is hand-dyed avocado paper” but it totally works.

I used blackcurrant and apple concentrate straight out of my kitchen cupboard. The paper came out a lovely soft pink and smelled divine for about a week. I worried it would eventually smell off, but it doesn’t, after several weeks it doesn’t smell of anything.

Do you enjoy a craft that you think we should add to this list? Tell us about it in the comments below and we’ll add it and give you a mention if you’d like.

Filed Under: Crafts

Best Diamond Painting Kits (Full Guide with Pro Tips and Tricks)

January 8, 2021 by Comfy Zen Leave a Comment

In this super-easy-to-follow guide, we’ll cover absolutely everything you need to know about getting started with diamond painting. We’ll give you full instructions with tips and tricks along the way, and we’ll also take a look at some of the best diamond painting kits out there, with quick recommendations for choosing the perfect kit, whether you just want a quick project or are up for a bit more of a challenge.

So if that all sounds good to you, let’s get started.

And no problem, if you just want to choose a diamond painting kit and skip everything else – our recommendations are all right here in the table below.

Type of Kit Our Picks Scroll
Partial Drill Diamond Painting Kits

5D DIY Diamond Painting by Number Kits, Mandala Flower By Windale
This is a gorgeous partial kit which means you won’t be filling the entire canvas with drills, but there are still tons of drills to add to keep you busy. An excellent choice for a first diamond painting – not too much of a time commitment but very sparkly and pretty. You can see more of this one in the video above.
Size: 12 x 12 inches

5D Diamond Painting Kits for Adults – The Kiss Gustav Klimt
This is another fabulous option if you are just getting into diamond art. Lots of sparkles and what’s not to love about a Klimt.
Size: 15.75×19.68 inches
Read More
Full Round Drill Diamond Painting Kits
Eiflow 5D Diamond Painting Kits for Adults Sunflower
With this one, you will be filling the entire canvas with round drills. Round drills are a little more forgiving than square drills when it comes to lining them up straight. You will see a tiny bit of the printed canvas in the background around the drills.
Size: 12 x 12 inches
Read More
Multi Pack Kits
4 Pack 5D DIY Diamond Painting Full Drill by Nurkul
A fabulous set of animals. With good detail when completed. And get 3 more to complete the set. This is a full-round drill set.

Size: 12 x 16 in (approx each)
Read More
Full Square Drill Diamond Painting Kits

ANMUXI 5D Diamond Painting Kits Full Square Drills for Adults
This is a full square drill kit. So you will be filling the entire canvas to make up the image. It comes in a range of different sizes and you get 2 drill pens with 3 drill placer heads for placing a line of drills in one go.
Size: 12 x 12in
Read More

Let me start out by saying if you are new to diamond painting, it’s pretty new to me too. It’s only been around for a few years, so it’s definitely not something I grew up with.

It was invented by a company based in China back in 2010 and took several years to really take off. Now it’s hugely popular and this is only the beginning.

How Easy is Diamond Painting and Will I Like It?

Below is a very short video to give you an idea of what diamond painting is all about.

If you already like cross-stitch or painting by numbers, you’ll love diamond painting. The principle is basically the same. Diamond painting even uses the same DMC color system using the 489 colors that you will be familiar with if you’ve ever done cross-stitch before.

But even if you’ve never done anything like it before, it’s just about the easiest craft you could choose. While it looks super impressive when your painting is completed, it’s one of the most stress-free creative activities you could do.

It’s also very easy to just dip into it every now and then – especially when you compare it to knitting or crochet for example. You see with diamond painting, you can see at a glance where you are up to and what you need to complete next.

And you can start or carry on anywhere on the canvas that you like.

Lastly, it’s so relaxing and meditative, and you don’t need to fully concentrate on it, so you can listen to music, a podcast, an audiobook, or watch something on tv at the same time.

And what a lovely activity to do with your children or grandchildren!

So what’s not to love?

Pro Tip 1
If your canvas won’t lie flat, lift the film at each corner of your canvas and replace it. This simple trick should make your canvas lie flat.

How to do Diamond Painting

It’s super easy:

  1. Your canvas will come with a key. The key will be numbered and/or it may have symbols next to it. There will also be a corresponding DMC number. Match, and stick your diamonds (or drills as they are called) to the sticky surface of the canvas using the color key provided.
  2. Pour some drills into the tray provided in your kit and give it a gentle shake. This will turn all your diamonds the right way up.
  3. To make picking up the drills easy, a drill pen is provided with a hollow nib. Each kit also comes with a small piece of (usually pink) wax. Press the end of the nib into the wax.
  4. Pick up and place your diamond drills onto the canvas.
  5. You will notice that the canvas has a piece of film protecting its sticky surface. Uncover only the small area you are working on at any one time. This is to keep the canvas fluff-free and clean.
Pro Tip 2
If you notice any areas of the canvas have a bumpy or uneven glue surface, use a sharp craft knife to score the surface until the glue evens out. This is important as it will prevent a visible ridge of uneven drills from appearing in your finished piece.

How to Choose a Diamond Painting Kit

There are really three basic types of kit you can choose between and we’ll run through those now:

A Partial Kit

A good way to dip your toes into a diamond painting is with a partial kit.

By this, we mean one that has the high-quality inked background to which you add sparkle and detail with your diamonds.

And just so you know, these kits don’t just give you the odd diamond to add here and there. They have tons of diamonds in them for you to place. And the final effect is stunning.

Another good reason to choose a partial kit is that it’s generally much easier to see the symbols or numbers on your canvas.

Serious diamond artists tend to prefer full drill kits. The finished result of any type of kit has the potential to look stunning. But the full drill kits offer present more of a challenge.

A Full Round Drill Kit

These kits require you to fully cover the canvas with diamond drills. They are a little easier to line up because their circular shape means there is a tiny bit more space around them.

That means you will see some of the canvas in the background – but it will be printed the same color as your drill, so won’t be very noticeable.

A Full Square Drill Kit

Square drills are a little harder to line up straight. But there’s a handy tip to making it easier.

You simply place your drills in a checkerboard pattern and then go back and fill in the gaps.

If you choose a full drill kit, either round or square, you may find it a little difficult to see the symbols. Working over a lightbox or light pad can make things so much easier to see. They are surprisingly cheap too!

If you think you need a lightbox to see what you are doing, try to go for a dimmable one if you can.

Pro Tip 3
If you choose a full drill kit you may find that the edges outside of the working area are sticky too. To keep the edges fluff-free and clean, it’s a good idea to lay a strip of washi tape all the way around the edges of your canvas.

Now it has to be said that if you are filling an entire canvas with drills, your finished picture will inevitably look pixelated to some degree or another. As a rule of thumb, the larger the canvas, the more detailed and less pixelated the final image will be.

Of course, unless you are up for a challenge, that’s not necessarily what you want to hear if you are just starting out. It’s a huge time commitment for a start and you may feel a bit overwhelmed with a large canvas and tons and drills.

The best advice I can give you is not to choose a canvas that’s too big unless you already know you’re going to be hooked, but do choose kits where real people have posted a photo of their finished piece. That will make it easier to judge whether or not you’ll like the final result. …And that, of course, was an essential factor in choosing our recommendations.

Pro Tip 4
Store and label your spare diamonds when you have completed your kit. You never know when you may need a few extra ones in future kits. You can also use them to embellish birthday or Christmas cards etc. The possibilities are endless.

Partial Drill Diamond Painting Kit

5D DIY Diamond Painting by Number Kits, Mandala Flower By Windale

This is the kit I am working on now you can see it in the video above. I’m loving how it is turning out.

It comes with a mixture of different shapes and sizes of drills and the effect is super sparkly and pretty.

Although you only embellish the image, it’s kept me happily busy for about an hour each evening for the last couple of days and I’ve still not finished it as you can see (the finished project is shown above).

Check Price

Eiflow 5D Diamond Painting Kits for Adults Sunflower

If you look on Amazon you can see the photos of the completed painting posted by diamond artists.

We think it looks stunning.

Check Price

Multi Pack Kit

4 Pack 5D DIY Diamond Painting Full Drill by Nurkul

Tons of color to brighten your day. These look fantastic when done.

Check Price

Full Square Drill Diamond Painting Kit

ANMUXI 5D Diamond Painting Kits Full Square Drills for Adults

This one comes in different sizes so if you want more of a challenge, we say go for it!

For best results, a light pad may be the way to go but they are super cheap. Choose a dimmable one.

Check Price

Other Kits

Diamond Painting Bookmark by Ross Beauty

Fantastic gift. Super cute. What’s not to love?

Check Price

SUSSURRO 9 Pieces DIY Diamond Painting Keychain

Adorable. I suggest setting these so that the diamonds don’t drop off. Mod podge or similar will work.

Check Price

If there’s anything good that you think we’ve missed, or if you have any questions about anything, then let us know down in the comments below.

Filed Under: Crafts

Beaded Lace Necklace – With a Video Tutorial

December 11, 2020 by Comfy Zen Leave a Comment

Join me in making a beaded lace necklace.

I’ve been in full-on work mode for the last couple of weeks, so decided to down tools on Sunday and spend the day beading which is both fun and relaxing.

I love that you can take a few beads and create something really pretty and unique. And when you don’t get your thread in a knot, or realize you missed a bead way back, it’s a great way to unwind take your mind off the stresses of everyday life.

So I thought I would share with you the simple beaded lace necklace I made.

The inspiration for this necklace, in case you were wondering, was simply that I wanted to make something pretty and delicate but still casual looking, to wear with a couple of things I bought recently. And I just love the color combination of the Picasso Seafoam green with the watermelon.

The beaded lace necklace is super easy to make. In fact, if you look at it closely you can see that it consists of just two units that repeat.

I’ve added an 8mm faceted round bead and a loop clasp. It looks really pretty in real life and costs much less than buying a metal one. And don’t worry about it coming undone. I’ve made several necklaces using a bead and loop closure and have honestly, never had a problem with one coming undone.

Comfy Zen Beaded Lacy Necklace

How to Make a Beaded Lace Necklace

I made the video below so you can see how I made it – and below that is a materials list and my notes on the project.

I’ve also included a PDF download below with tips on how to thread your beading needle – the easy way. Plus a few notes on needle sizes and beading threads.

How to Thread a Beading Needle and Other Pro Tips for New BeadersDownload

And don’t worry even if you’ve never tried bead weaving before. If you are looking for a creative hobby, and you’d just like to give it a try, you’ll be happy to know you don’t need any special skills, to begin with. You’ll pick things up easily and if you find a pattern you like you’ll find you will simply learn new techniques as you go along.

Materials You Need to Make Your Lacy Necklace

  • 11/0 Miyuki Seed Beads Main Color
  • 11/0 Miyuki Seed Beads Accent Color
  • 3x 15/0 Seed Beads
  • 3.4mm Drop Beads
  • 2x 4mm Bicones
  • 1x 8mm Round Bead or Rondelle
  • Beading ThreadSize 10 Beading Needle
  • and a Stop Bead.
Opaque Matte Picasso Seafoam Green from Etsy

Notes:

I designed the Lacy Necklace using just two colors, Opaque Matte Picasso Seafoam Green and Watermelon. But you can of course use any color combination you like.

Bead Links to Etsy:

  • Opaque Matte Picasso Seafoam Green
  • Watermelon

Adding New Thread

Start with a new thread in the previous unit and follow the bead path making a half hitch knot on your way make sure you come out of the same bead you left your old thread and continue beading. You can sew the loose ends back in later.

I hope you found this tutorial helpful. Please do leave me a comment down below.

Here’s a sneak peek of my new stash of craft supplies. I have a couple of craft projects lined up that I have never tried before. I love trying new crafts so I will share what I make mistakes and all.

Comfy Zen Stash of Craft Supplies

Happy beading!

Filed Under: Crafts

Fairy Gift Ideas and Keepsakes for All Ages

November 28, 2020 by Comfy Zen 2 Comments

This collection of Fairy Gift Ideas and Keepsakes for All Ages is a celebration of hand-crafted fairies, and all things fairy related. Let’s face it, we could all use a little sprinkling of fairy dust in our lives – something sweet and joyful to make us smile – whatever our age.

And just so you know, this fairy gift ideas guide is not just a selection of random, commercial (and usually overpriced) fairy merchandise. We’ve only selected the most thoughtful gifts created by talented craft makers and authors.

So with that in mind, we will be taking a little break from the everyday stresses that come with being a human and enter the enchanted world of fairies.

Mother Daughter figurine by Petra Vengar owner of PETRUSKAfairyworld on Etsy

Here’s what’s on our wish list, so you can scroll straight down if you want to:

Fairy Gift Idea Details
Needle Felt Fairies
These sweet, handmade Waldorf style fairies are suitable for special occasions or just as a stocking filler.
Fairy Books

Written in 1923, The Flower Fairies is the ultimate fairy book.
Fairy Costumes
Stunningly beautiful fairy costumes – all hand-made by talented designers and makers on Etsy.
Small Fairy Themed Gifts to Capture Children’s Imagination
Fairy doors and tooth fairy gifts.
Signs a Fairy is Nearby

Why Give a Fairy Gift?

There’s a reason why so many children love fairies. Fairies are the gateway to their creative imagination -as well as a welcome break from the everyday rules of life we all have to follow.

But I think that’s also the reason why adults love them too and the reason why fairy art prints, needle felted fairies, and other fairy themed items are so attractive to all of us.

Needle felted fairies, make especially decorative and thoughtful gifts for a best friend or for a special event such as the arrival of a new baby, baptism, or other special occasions. And honestly, they really don’t have to cost the earth!

Fairy Gift Ideas No 1 | Needle Felt Fairies

You can find beautifully handcrafted, themed needle felted fairies on Etsy, and in many cases, you can request to have one custom made especially for you or for a friend if you have one in mind.

Below are a few very affordable and beautiful new mom themed fairies on Etsy.

DIANA – Needle Felted Fairy by Sophie Streit
Mom and baby Waldorf inspired Mother fairy Fairy by Mariana Carrera Dufourg
XYLIA- Needle Felted Wool fairy with baby by Sophie Streit

Waldorf Style Fairies

You may have noticed that many needle-felted fairies all have a similar and very distinctive style? That’s because they are based on the educational philosophies of Waldorf (or Steiner).

Waldorf inspired needle-felted fairies are designed to be minimalist, allowing the imagination to fill in the extra details. They are simple, yes, but at the same time, they are incredibly expressionistic and convey so much more emotion than you would think their simplicity would allow.

Below is one I made myself. It was my first one so I’m over the moon with how well she turned out.

Our Favourite Fairy Fiber Artists

Here are some of my favourite fibre artists with a few examples of their work:

Petra Vengar is from Slovenia in Europe. She is an incredibly talented mother of two daughters, both of whom attend a Waldorf school. It was through them that she was inspired to create these stunning needle felted fairies.

They are all as exquisite as the ones you can see below. And if you ask her, she will even make you a custom fairy.

Petra says “you can choose a hair color, color of dresses, hairstyle …actually, you can decide what story you want to tell and I can help to create one…”

You can visit Petras Etsy store and see more of her work, there.

Needle Felt doll Fairy figurine by Petra Vengar owner of PETRUSKAfairyworld on Etsy
Needle Felted Fantasy doll by Petra Vengar
Needle felted Flower Fairy doll by Petra Vengar

Rebecca Varon owner of Nushkie on Etsy.

A native of New York and now living in California, the very talented Rebecca Varon, shop owner of Nushkie on Etsy was inspired by her daughter to make natural toys. She uses organic wool, merino wool fibers, silk fiber, and wire to make her wonderful creations. Rebecca will also make you a custom fairy.

Needle Felted Wool Fairy by Nushkie on Etsy

You can see examples of Rebecca’s work below and more of her work here.

Ethereal Crystal Winter Fairy by Nushkie on Etsy

Sophie Streit owner of LivelySheep on Etsy UK

Sophie started needle felting just after the birth of her first daughter and quickly became hooked. She has recently moved to Irland where she makes exquisitely detailed, Waldorf style faires, inspired by nature.

Needle felted Flower Fairy by Sophie Streit owner of LivelySheep on Etsy

Here are some more stunning examples of needle felted fairies, made by Sophie and other European fiber artists on Etsy.

Forest flower Fairy by Sophie Streit owner of LivelySheep
Moon Fairy Mobile by Tiziana Bernhard owner of Giodali on Etsy
Garden flower Fairy by Sophie Streit owner of LivelySheep

Spring Summer Fairy by Margot van de Wiel owner of FilzartShop
Waldorf Inspired Needle Felted Standing Fairy by Sarah, owner of WillowthewispUk
Needle felted fairy by Galia Borozdina owner of
DreamsLab3

Fairy Gift Ideas No 2 | Fairy Books

Books make wonderful gifts for children. I think I am not the only person who still owns a few much-loved childhood books. Richard Scarry‘s Animal Nursery Tales is one of my keepsakes. I loved the illustrations (still do) and I also have a very old, but beautiful copy of Alice in Wonderland – passed on to me by my mother, from her childhood.

So if you’d like to give a gift that a child might want to keep forever, what book could be more worth treasuring than a Flower Fairies book?

Cicely Mary Barker’s Flower Fairies books have delighted children and adults for almost 100 years.

Cicely Mary Barker

And no wonder. First written in 1923, her books were filled with botanically accurate illustrations, and her fairies were all based on the sweet faces of real children that she sketched at her sister’s nursery school.

I think she has a very sweet face too, don’t you?

Accompanying each fairy illustration is a short song or poem – admittedly they are very old fashioned, but still charming.

Flower Fairies Books on Amazon US and Amazon UK

You can meet Cicely’s fairies on the Flower Fairies website, and if you’d like a free coloring activity, you’ll also find a selection of black and white illustrations to print off.

Eight of her books are contained in The Complete Book Of The Flower Fairies that you can see below.

The Complete Book of the Flower Fairies

The Complete Book Of The Flower Fairies is available both in the US and the UK.

The Pop Up Books

When I was a child I loved pop-up books. Pop up books made me feel part of the story itself. The flower fairies series also has a selection of completely enchanting pop-up versions of the flower fairy books.

If you are in the US you can view them on Cicely Mary Barker’s author page here. If you are in the UK, you can view them here.

Fairy Gift Ideas No 3 | Fairy Costumes

We couldn’t have a fairy gift ideas guide without a few fairy costumes.

Children love to play at dressing up and rather than buying a cheaply made outfit that falls apart and looks a mess, you can find stunningly beautiful, handmade fairy dresses that are completely affordable.

Ideal for a party or special occasion, these dresses won’t go back into the closet to be outgrown before they get the chance to be worn again.

And did we mention how affordable they are?

So there’s a range of prices depending on what you go for, but if you compare some of the prices from FuzzyDucklingDesign‘s range to this one on Amazon, you’ll get the idea of what I’m talking about.

You can see more of Lisa Garcia’s wonderful creations at FuzzyDucklingDesign.

Woodland fairy costume by Lisa Garcia from FuzzyDucklingDesign on Etsy US

There are some beautifully handcrafted fairy costumes on Etsy. Above, is the Woodland fairy costume by Iowa, based designer and maker, Lisa Garcia from the United States.

And here is a stunning LILAH flower fairy tutu by British maker and designer Jade, owner of AramintaBoutique.

You can add some wings here.

Little Dreamer Fairy Wings

Small Fairy Themed Gifts to Capture Children’s Imagination

For this section of our fairy gift ideas guide, we’ve put together a selection of small fairy related items to spark a child’s imagination.

Fairy Doors

I would have loved one of these when I was little, I think every bedroom should have one, and there are some that you can place in the garden.

Fairy Door Set from the ThePurpleMooseShop (California, United States) on Etsy

And here is a selection from UK based sellers on Etsy.

The Goblin Fairy Door from a selection by Little Lodgers on Etsy UK
Personalised pink Fairy door by mapleandgrace on Etsy UK
Grey Personalised Fairy door set with accessories by Littlelandfairydoors on Etsy UK

Another idea from mapleandgrace, I love the description on this listing “perfect for writing notes to the fairy behind your fairy door”

And lastly, (until we add some more finds).

We all know that fairies have a very important job to do. So we’ve added some tooth fairy kits for girls and boys, from LittleLetterUK to our fairy gift ideas guide.

Tooth Fairy Little Letter Gift from the fairies with Magnifying Glass and Tooth Chart from LittleLetterUK
Personalised tooth fairy Kit for Boys from LittleLetterUK

The History of Fairies

Though little is known of the true origins of these sweet little spirits of nature, they have endeared themselves to us over the years and ignited the imaginations of both children and adults alike.

I just wanted to show you this painting below, I think it’s completely stunning and sadly one of way too few famous paintings by women. Sophie Gengembre Anderson entitled the painting Take the Fair Face of Woman, and Gently Suspending, With Butterflies, Flowers, and Jewels Attending, Thus Your Fairy is Made of Most Beautiful Things.

A portrait of a fairy by Sophie Gengembre Anderson (1823 – 1903) painted (1869).

If you’d like some decorative butterflies of your own, you can find some really pretty ones like the ones shown below.

Some Famous Fairies – A Fairy Timeline

  • 1595-96 | William Shakespeare writes A Midsummer Nights Dream and everyone – apart from Samuel Pepys ( I’ll put his comments below, reading them always makes me laugh)* – is mesmerized by the fairies in the play. Peaseblossom, Cobweb, Moth, Mustardseed, and Puck. Puck is technically a sprite and he serves Oberon and Titania (the Fairy King and queen).
  • 1697 | Charles Perrault writes a version of an age-old tale – Cinderella. But his version which is a lot more palatable than some of the other (gruesome) tales of the time, includes the adorable fairy godmother (and pumpkins).
  • 1911 | J. M. Barrie publishes Peter Pan, and we are delighted by Tinkerbell.
  • 1917 | The famous Cottingley fairy hoax hits the headlines of the day. Two little girls who claim to have seen and photographed real fairies caused a huge stir and convince many, including Sir Arthur Conan Doyle that the photographs were proof of the existence of fairies. (Everyone knows they can’t be captured on film).
  • 1923 | Cicely Mary Barker is inspired to write a series of Flower Fairies books with more than a hundred botanically accurate illustrations. Drawing the faces of real children she sketches at her sister’s school, she brings the characters of her fairies to life.

* An extract from the Diaries of Samuel Pepys Monday 29th September:

“and then to the King’s Theatre, where we saw “Midsummer’s Night’s Dream,” which I had never seen before, nor shall ever again, for it is the most insipid ridiculous play that ever I saw in my life.”

We hope you found this Fairy Gift Ideas guide helpful. If you think there is anything fairy related that we should add to this list just let us know.

Filed Under: Crafts

Free Macrame Feather Pattern with Video

November 18, 2020 by Comfy Zen 5 Comments

Easy Macrame Feather Tutorial

Things have been pretty busy for me lately, between many hours of writing, and illustrating book covers, I haven’t had much time to create anything crafty for a while. So I thought I would stretch my fingers for a bit and make something fun.

A few months ago, I moved to a (tiny) cottage in a village by the sea. Doing it up is a work in progress, but it’s starting to feel more like home. We have a small wall by the window that needed a little something, so I thought I’d make a macrame feather and show you how I did it.

How to Make a Macrame Feather

So here is a little tutorial on how to make feathers (or leaves) out of macrame cord. You can follow the written instructions below or make one along with me in the video.

It’s my first try at making a video, you can hear the seagulls and the occasional car passing through, but the video was fun to make, and so I hope to make some better ones in the future.

Notes:

So heads up, macrame feathers do tend to flop a little. You kinda need to handle them as little as possible once you’re happy with your shape. You can use stiffening spray on the back. I didn’t use any on mine. But now it’s on the wall, I leave it where it is. If it needs dusting, I will just comb it back into shape.

My scissors are a little blunt, they have seen one craft too many, so I need some new ones. Make sure you get yourself some sharp scissors.

And lastly, I used single-cord macrame rope which is ideal for fringing, the color I used was called raw denim.

Materials You Need to Make Your Macrame Feather

Here is a list of the materials you will need:

  • 3m single cord, macrame cord (I used Bobbiny 3mm Cord from Etsy).
  • A pair of scissors.
  • A tape measure.
  • A comb.
  • Approx 7″ length of twig, dowl, or piece of driftwood.
  • A 4″ x 8″ piece of card.

If you’ve watched the video, I hope I have inspired you to make some feathers of your own and I hope you found the video helpful.

If you are new to macrame and would like to try making something else, take a look at some of the macrame kits available on Etsy that we have featured here at Comfy Zen.

Below are the written instructions for the project.

Instructions

Easy Macrame Feather Tutorial
Materials

Gather your materials.

Easy Macrame Feather Tutorial
Step 1

Measure and cut 22, 10″ lengths of cord. And 1, 25″ inch length.

Easy Macrame Feather Tutorial
Step 2

Fold the longer length in half and make a larks head knot. This will form the stem of the feather.

Easy Macrame Feather Tutorial
Step 3

Take 2 shorter lengths of cord folded in half. Place one loop from the left under the stem and one from the right over the top top of the stem – in the opposite direction. Pass the loose ends through each loop on the opposite side.

Easy Macrame Feather Tutorial
Step 4

Reverse and repeat the process by placing a looped cord under the stem the from right, and over from the left, to make the knot. Repeat with loops from alternate sides until you have used up all 22 lengths of cord. You should have 11 knots.

Easy Macrame Feather Tutorial
Step 5

Comb the cords to separate the strands.

Easy Macrame Feather Tutorial
Step 6

Your feather should now look like this.

Easy Macrame Feather Tutorial
Step 7

Make a template out of the card. You will only need to make half a feather or leaf shape – you can just reverse it when you trim the other half of your feather.

Easy Macrame Feather Tutorial
Step 8

Placing the template underneath your feather, comb the feather’s fringe to neaten. Trim around the edges.

Easy Macrame Feather Tutorial
Step 9

The trick to getting a nice even edge is to take your time. Comb it a few times and keep checking to see how it’s taking shape.

Easy Macrame Feather Tutorial
Step 10

Finally, shape it with your fingers…

Easy Macrame Feather Tutorial
Hanging your feather

And it’s ready to hang.

Easy Macrame Feather Tutorial
Feather Wall hanging

If you make a feather, please send me some photos and I will post them here :).

Filed Under: Crafts, Featured

Best Heat Guns for Crafty People

November 16, 2020 by Comfy Zen Leave a Comment

Here’s our guide to choosing a heat gun to use for your crafts. Our top recommendations are based on the most suitable options, to help you get the results you want for whatever type of craft you are into.

If you are new to embossing, you’re going to find a heat gun is an essential tool to heat the embossing powder to the temperature required to melt it.

The same goes for curing a screen print, and there are other crafts that require higher temperatures to work too, including melting beeswax/soy wax, for candle making, applying HTVs, removing bubbles from epoxy resin, shrink wrapping, and removing decals, etc.

A hairdryer just won’t do, it will blow a much higher volume of air at a much lower temperature not what you want. Especially when you are working with embossing powder – there’s more chance of the powder blowing all over the place than of it actually working.

So safety first! This is obviously a crucial factor when choosing a heat gun, so we just want to point out that all of the heat guns we’ve reviewed here, conform to the highest safety standards.

embossed notebook

If you aren’t going to be using a heat gun very often, need one for travel, or need to keep your craft supplies from taking over by taking up much space, the ENGINDOT Mini Heat Gun has the smallest footprint. It’s also our cheapest option.

The advantage of our other choices is that they have dual or multiple heat settings, to give you more control over the temperature you use.

Our top pick is the Wagner HT400. We have featured Wagner’s products here on Comfy Zen before (they also make exceptionally good paint sprayers for furniture).

We were particularly impressed with Wagner’s new heat gun design, not least because you are much less likely to catch your hand and burn it on the hot nozzle. The upright stand means it’s not lying horizontally on your craft desk where you could accidentally knock it with your hand.

If you need a heat gun that is also suitable for a wider range of crafts, can handle larger projects, or that you can emboss with but also use around the home for DIY projects, Wagner’s Spraytech 550 Hot Air Tool is the heat gun that we recommend.

Our Top Pick: Wagner Spraytech Hot Air Tool

Wagner HT400 Spraytech Hot Air Tool

Perfect for crafts that require heat to work, Wagner’s new lightweight, ergonomically designed, 3-user positions, heat gun gives you the flexibility to use it in the way that feels most comfortable for whatever you are working on.

Additionally, it has 2 temperature settings to give you control over the heat output.

We love this one, it’s such a simple design and the upright design of the stand means the nozzle is not lying around on your desk surface – so you won’t accidentally touch it and burn your hand while you are working.

Conforms to UL STD 499
Certified to CSA STD C22.2 No. 60335-1 and 60335-2-45

Check Price on Amazon

What We Like:

  • Suitable for all kinds of crafts – The upright stand design keeps the nozzle away from the surface of your tabletop. This means there’s no risk of accidentally burning your hand on the nozzle while you are working.
  • Dual temperature settings – 450°F (230°C) 680°F (360°C).
  • Three Usage Positions – palm, pencil, and hands-free.
  • Long Cord Length – 6-Foot

Weight: 0.7 lbs.

You can see it in action in the video below.

Runner-Up: Chandler Tool Embossing Heat Gun

Chandler Tool Embossing Heat Gun

This is the perfect tool for embossing by the US company Chandler. We think would also make a great gift for like-minded craft lovers – there’s even a matching glue gun to go with it!

Lightweight and cool to the touch, it features an insulated body, dual heat settings so you can control the amount of heat it puts out, and it also comes with a nozzle safety shield.

As with all the heat guns we have featured here it conforms to all safety standards and this one comes with UL certification.

Check Price on Amazon

What We Like:

  • Safe and Reliable – this one is perfect for embossing. We think it would make an ideal gift too, you can even get a matching glue gun.
  • Dual Temperature Settings: 392°F (200°C) 572°F (300°C).
  • Nozzle Safety Shield – You can’t accidentally touch the hot metal.
  • Cord Length – 6-Foot is a good length if you aren’t near an outlet.

Weight: 0.8 lbs.

Also Great: ENGINDOT Mini Heat Gun

This is the cheapest option we have featured and it’s also the most compact one too.

It doesn’t have dual heat settings like our other picks, but don’t let its smaller size lull you into thinking it’s not going to put out enough heat. This heat gun reaches a temperature of up to 662°F (350°C).

But as always safety comes first, so it does have thermal protection. This means that if, in the unlikely event that, it overheats, it has short circuit protection so it will just power off automatically.

A spoon reflector tool is also included which is very effective in concentrating and confining the heat output to just the spoon area.

Check Price on Amazon

What We Like:

  • A Great Budget Option – For its compact size, it’s powerful and efficient.
  • Compact Design – It’s one of the smallest models out there.  
  • A Long Cord Length – At 6.56 Feet this is longer than its competitors.

Buying Factors to Consider:

This one only has one temperature setting: 662°F (350°C).


Weight: 0.6 lbs.

Another Worthy Mention: Wagner Spraytech 503087 Furno 550 Heat Gun

Wagner Spraytech 503087 Furno 550 Heat Gun

This one is suitable for just about any craft that requires heat.

No fewer than 12 temperature settings (150°F to 1200°F) and two airflow speeds means you can, of course, emboss with it, but you can also do so much more – including acrylic paint pouring, wood-burning with a metal stencil, wax crayon art, shrink wrapping, and candle making, etc.

And if you are DIY-minded, you can also use it for projects around the home (such as for paint stripping or repair, etc).

The Wagner features an easy-to-read LED screen with push-button controls so you can clearly see what temperature you have set.

The heat gun includes a concentrator nozzle, a flare nozzle, a glass protector, and a curved deflector. This one even comes with a carry case to keep everything together.

For well under $40 this one is worth every penny.

Check Price on Amazon

What We Like:

  • Suitable for a Wider Range of Projects – This one is especially versatile. It’s suitable for stencil wood burning, acrylic paint pouring, wax crayon melting, paint removal, sublimation and candle making, and more.
  • 12 Temperature Settings – Ranging from 150°F to 1200°F th
  • It Comes With Accessories – Five Nozzles Accessories mean you can customize it according to the project you want to use it for

Cord Length: 5.25 Feet.
Weight: 1.984 lbs.

Other Worthy Mentions

ZHUOEN Mini Hot Air Gun

Its super low price makes this one a very popular choice.

  • Temperature: 200°C/390°F
  • Material: ABS Plastic, Stainless steel
  • Nozzle Safety Shield
Check Price

Homidic 6.56FT Long Heat Gun, Mini Handheld Hot Air Gun

Another nice little budget option.

  • Temperature: 200°C/390°F
  • Material: ABS Plastic, Stainless steel
  • Nozzle Safety Shield
Check Price

We hope this review has been helpful.

If there’s anything good that you think we’ve missed, or if you have any questions about anything, just let us know in the comments below.

Filed Under: Crafts

The Best Screen Printing Kit – A Buyers Guide

November 9, 2020 by Comfy Zen Leave a Comment

Would you like to print promotional material for a band/gig or a new business or sell, t-shirts, posters, and more? Maybe you are looking for a new hobby to unleash all that pent-up creativity.

A screen printing kit is the easiest way to learn this craft. And we’ve recommended kits for several other crafts over the few past months.

Why? …Simply because they are the quickest way to really get to grips with what you are supposed to be doing. You’ll learn way quicker with a good starter kit – not least because they take out all the guesswork, and hours spent trying to work out exactly what materials you are supposed to buy to get yourself set up.

Everything will arrive all together in one box – including easy to follow uncomplicated instructions. So you can open up your kit and start screen printing right away. Kits also make great gifts for like-minded creative friends!

This is a full guide to the best screen printing kit, with our top recommendations to get you started.

Up for that? Let’s dive in.

A Promotional Code to Use at Blick.com
Editor’s Award Product Scroll
Best Photo Emulsion Kit for Fabric Printing
Speedball Advanced All-In-One Screen Printing Kit

View on Amazon or Blick.com*
Review
Best for Artists, Printmakers and Fabric Printing
Daler-Rowney System 3 Screen Printing Set

View on Amazon or Blick.com
Review
Best for Printing T-Shirts and Small Business Set-Up
DIY Print Shop Screen Printing Kit

View on Amazon or Blick.com
Review
Best Introductory Kit | Best Budget Kit
Speedball Introductory Screen Printing Kit

View on Amazon or Blick.com
Review

Click to jump straight to each topic.

  • What to Look for in a Screen Printing Kit
  • The Best Screen Printing Kits Reviewed
    • Best Photo Emulsion Kit for Fabric Printing
    • Best for Artists, Printmakers and Fabric Printing
    • Best for Printing Posters, Flyers, and T-Shirts for Gigs
    • Best Introductory Kit | Best Budget Kit
  • Other Worthy Mentions
  • Frequently Asked Questions
Speedball Advanced All-In-One Screen Printing Kit From Amazon and Blick.com

Different Types of Kits

Below is a brief explanation of the different types of screen printing that you can try and I’ve also provided a glossary of terms which includes the tools and the types of media that a screen printing kit will typically contain. The contents of each kit will vary according to the type of kit you choose.

My only criticism is that they don’t come with a sheet of glass or acrylic to keep transparencies in place. And for most kits, (with the exception of the DIY kit) you will also need masking tape to keep the ink from running inside the edge of the screen and the frame.

You will also need a good heat source – like an iron, a heat press machine if you have one, or a heat gun. This is an important step you’ll need to take in order to cure your print, once it’s dry.

Here’s is a simplified rundown of the different methods of screen printing you can use – just so you get the idea of what’s involved.

  • Stencil Method | The most basic method, but still very effective. The stencil paper creates a masked-out area which effectively prepares your screen for printing.
  • Drawing Fluid and Screen Filler | Draw or paint freehand (or trace directly) on the screen, then use screen filler to create a mask. Once the drawing fluid is washed off, the screen is ready for printing.
  • Photo Emulsion | This method requires the screen to be pre-prepared with a light-sensitive emulsion. The design is then UV exposed onto the screen. Once the design is washed off, the screen is ready for printing.

What do the Kits Come with?

A Wooden Screen Frame and Base | Sizes vary between the kits. The Speedball kits are smaller, so check what size comes with each kit to make sure it’s suitable.

Sensitizer | This is a type of activator used in the photo emulsion method. Sensitizer is a dry paste to which you will need to add water and mix well. Just so you know, the bottle may feel empty before you add water, but be assured, it does contain the sensitizer.

You will usually need to mix and use activator in a darkened area unless otherwise stated. (Speedball’s Diazo Photo Emulsion does not require a light safe environment.)

Photo Emulsion | When correctly mixed with a prepared sensitizer, above, photo emulsion will turn from bright blue to green. It can then be applied to the screen. Pro tip – Refrigerating sensitized emulsion will give it a shelf life of 4 months, just make sure it doesn’t freeze.

A Squeegee | Suitable for fabric or paper/card screen printing. Fabric squeegees have a rounded edge and a graphic squeegee will have a square edge.

A Scoop Coater | The DIY kit includes a scoop coater. A scoop coater has a reservoir to hold emulsion. This enables you to apply a nice even coat to the screen more easily.

Screen Printing Inks | Some kits have more of a selection of colors than others. These may be water-soluble inks, fabric inks, or acrylic paints (with a medium that makes them suitable to use). Some kits contain white plastisol (a plastic paint) for a high opacity when printing white on to dark fabrics.

Photo Emulsion Stripper/Remover | Not all kits contain this, but it is used to remove the emulsion and restore your screen back to its original condition for future use.

Exposure lamp and Photoflood Bulb | Your kit may or may not come with a light source depending on whether the print method uses the photo emulsion method or not. If included, kits may contain a UV Bulb and a light safe bulb for a darkroom environment.

Accessories | Kits may also include craft sticks, card and drawing fluid, screen degreaser, and transparencies, etc.

Full Instructions | All kits come with good instructions and there are tonnes of youtube tutorials to follow.

There are lots of helpful youtube tutorials out there. And I’ve included a youtube demonstration video for each kit where possible.

If you’d like to watch a quick video to see what the process involves, I recommend this one from Blick Art Materials as a quick introduction to screen printing on a t-shirt. In this case, using a Speedball kit.

So, putting all of this together, let’s look at our recommendations for the best screen printing kits out there right now.

The Best Screen Printing Kits Reviewed

Best Photo Emulsion Kit for Fabric Printing: Speedball Advanced All-In-One Screen Printing Kit

Speedball Advanced All-In-One Screen Printing Kit

An affordable but comprehensive kit from the US art materials company Speedball.

We’ve featured Speedball before (they also make fantastic pottery wheels). And their screenprinting kits are another winner.

Check Price on Amazon

*Price is currently lower on Blick.com.

Ideal for t-shirt printing, this kit has everything you need to screen print on fabric. The kit includes an exposure lamp with a 200-watt photoflood bulb and a clamp.

Note, it doesn’t come with a yellow light-safe bulb, and that’s precisely why we love this kit – Speedball’s Diazo Photo Emulsion is formulated so it doesn’t need to be used in a light-safe environment.

That means you can work under normal lighting conditions and this saves you from having to blackout your windows or resort to just working after dark.

It comes with four, 4oz. jars of water-based fabric ink in black, red, white, and blue, and you get a 10 by 14-inch frame. Not the largest printing area out there, but perfectly fine for most people’s needs. If you take a look at the guy’s t-shirt on the box, you will get an idea of the print area we are talking about.

Speedball Advanced All-In-One Screen Printing Kit

What We Like:

  • Ideal kit for t-shirts -You can print line drawings, lettering, and photographic half-tone positives on fabric using the photo emulsion process.
  • A good size screen – 10 x 14 inches gives you plenty of room for a wide range of projects.
  • Inks – You get 4 Water-based inks.

The kit also includes:

  • Black, red, white, and blue water-based inks.
  • Sensitizer.
  • Emulsion remover.
  • 2x Transparencies, craft stick, and black card.
  • Lamp, photoflood bulb, and clamp.

Check the latest price on Amazon. Price is currently lower on Blick.com.

Best for Artists Printmakers and Fabric Printing: Daler-Rowney System 3 Screen Printing Set

This is a great kit for printing posters, ads, artwork, greeting cards, or fabrics.

What makes it a bit different is that it uses regular water-based acrylic paints to which a medium is added to transform the paint and make it suitable for textile printing or screen printing paper or card.

Check Price on Amazon

Check Price on Blick.com.

If you are arty and like the idea of creating freehand designs, or aspire to become a printmaker, this is the kit for you.

The kit is specifically set up to enable you to hand draw (or hand trace) your designs directly onto the large 16.14″ by 21.65″ screen – using the screen drawing fluid, provided.

The screen is then prepared for printing with a removable screen block which also comes in the kit.

Daler-Rowney System 3 Screen Printing Set

You can see how this kit works in the short demonstration video, below.

What We Like:

  • Print hand-drawn, hand-traced artwork for posters, ads, artwork, greeting cards, and fabrics using screen drawing fluid.
  • Large Screen – 16 x 21 inches.
  • Includes a good range of inks: The kit comes with 5 water-based acrylic paints and screen drawing fluid.

The kit also includes:

  • 5 Full-sized acrylic paints.
  • Textile printing medium.
  • Screen printing medium.
  • Removable screen block.

Check the latest price on Amazon. View and check the price on Blick.com.

Best for Printing T-Shirts and Small Business Set-Up: DIY Print Shop Screen Printing Kit

Similar to the Speedball kit we’ve looked at above, this kit also uses the photo emulsion method.

But this is a much larger kit, making it ideal if you want to print t-shirts to sell.

Check Price on Amazon

View and check the price on Blick.com

Now first let me say, you are going to need to do a bit of DIY to put this one together, (no pun on the name intended).

The instructions say the 14 x 14-inch platen should be fixed to a table, (so if you don’t have a designated craft table, you might want to consider fixing it to a wooden board instead).

And just in case you didn’t know, the purpose of the platen is to allow you to mount and hold your shirt in place (tacking adhesive is provided) so that you get a perfect print every time and the ink can’t run through to the back.

With this kit, you’ll get a generous 16 × 20 inches screen, allowing for larger prints, a professional 70 Durometer squeegee, and, something the Speedball kit doesn’t come with – a scoop coater.

Just so you know, a scoop coater is a black-colored tool you can see in the image below, it helps you easily apply a nice even coat of emulsion to the screen via its built-in reservoir design.

Unlike the Speedball kit, this kit comes with a sensitizer that is light sensitive – so it needs to be prepared and applied in a darkened room away from light.

For that reason, the kit includes a light-safe bulb and a UV Bulb.

The kit also includes:

  • 14 x 14-inch platen.
  • 16 × 20-inch screen.
  • Screen degreaser and emulsion stripper.
  • Black water-based ink.
  • White Plastisol ink.
  • Emulsion.
  • Cleanup cards, sponge, tape, gloves, pack of 10 parchment paper (so you can cure the shirts with an iron), 2 sheets of Rite Film WP film, and an instruction manual.
DIY Print Shop Screen Printing Kits
DIY Print Shop Screen Printing Kit

And again, you can see how this kit works in this full demonstration video, below -it is quite long so you may want to bookmark it for later.

What We Like:

  • A professional kit for t-shirt printing – ideal for a small business setup. (Poster kit also available.)
  • Large Screen: 16 × 20 inches.
  • Includes a starter press with 14 x14 inch platen.
  • Inks: White Plastisol ink (for dark fabrics). Black water-based ink.

Best Introductory Kit | Best Budget Kit: Speedball Introductory Screen Printing Kit

This kit is a complete bargain for what you get – so what’s not to love?

It’s a great kit to just have a go and see how you get on with screen printing.

Check Price on Amazon

View and check the price on Blick.com

It’s basically a two-in-one kit:

You’ll be using paper stencils (x50) to make prints. I recommend getting a good die-cutting machine if you want to take this method to the net level.

You can also draw freehand (or trace) using drawing fluid and screen filler to create and print your designs.

What We Like:

  • A fabulous starter kit for a bargain price using paper stencils and the drawing fluid/screen filler methods of screen printing.
  • Good Size Screen: 10 x 14 inches not too big or too small.
  • Inks: You get Red, and black fabric ink, plus acrylic black drawing fluid

The kit also includes:

  • Screen degreaser and emulsion stripper.
  • Red and Black ink.
  • Acrylic black drawing fluid.
  • Screen filler.
  • Screen Cleaner, marker paper pad, knife*, paintbrush, mixing sticks, and instructions.

* The kit would make a lovely craft gift – but be aware, it contains a knife.

Speedball Introductory Screen Printing Kit

Check the latest price on Amazon. View on Blick.com.

Other Worthy Mentions

Blick’s Complete Photo/Fabric Screen Printing Kit

The biggest kit we’ve looked at. It comes with Diazo inks which aren’t light-sensitive so you don’t need a darkroom. And a 12 x 18-inch screen.

Key Features:

  • Red, Blue, White, Black, and Yellow Diazo inks.
  • Screenprint with both fabric and paper.
  • Comes with enough emulsion to coat at least 10 screens.
Check Price on Blick.com


Jacquard Professional Screen Printing Kit

This kit has a wrap-resistant aluminum frame and the kit is suitable for multi-surface printing.

Key Features:

  • 10 x 14-inch screen.
  • Self-curing and opaque colors for printing on dark fabric.
  • Photo emulsion and Diazo sensitizer
Check Price on Amazon

We hope this list of the best screen printing kits has been helpful.

If there’s anything good that you think we’ve missed, or if you have any questions about anything, then let us know down in the comments below.

Filed Under: Crafts

Best Pottery Wheel | A Clear and Simple Guide

October 29, 2020 by Comfy Zen Leave a Comment

If you are wondering which pottery wheel to choose, this straight to the point guide will take you through some options to help you choose the most suitable, and therefore, the best pottery wheel for you.

The table below contains a summary of our top choices. But we also provide full reviews and information about what to look for as well. You can jump to each section from the table of contents below the table.

Choosing Your First Pottery Wheel

If you are just starting out, or just want to have fun and try your hand at throwing some pots, you probably don’t want to spend too much, and the good news is, the most expensive wheels, (which have centering capacities of 150 lbs and up) are frankly way more than you would need anyway.

So if you just want to have fun and not spend too much, for well under $200, our budget option is a pretty solid choice.

Alternatively, even if you have never thrown anything before, you may prefer to go for a step up from a basic pottery wheel. The Speedball Artista is an excellent choice for starting a new hobby.

It’s suitable for all skill levels. It’s practical and priced at under $500 it’s a lot more affordable than the full-sized ones. It also comes with a two-year warranty.

Tabletop Pottery Wheels

Tabletop pottery wheels are usually compact, and easily portable – the Speedball Artista and the Aspire Pottery Wheel by Shimpo are good examples. You can take them outside when the weather’s nice, and they’re convenient to carry with you to a pottery class.

Even as an experienced potter, you may just prefer to specialize in smaller pieces, so a compact tabletop pottery wheel may be all you ever need.

Some people do, however, struggle to find a suitable surface to place a tabletop pottery wheel on. You will need to find somewhere to position it at a comfortable height to work. But you may be able to find, or even make, a table that’s suitable for your tabletop pottery wheel.

Hand Operated vs Foot Operated Pottery Wheels

Tabletop pottery wheels may be hand-operated or foot-operated (via a foot pedal). On balance, hand-operated pottery wheels are generally easier to work with for a beginner. The simple reason is that it can be a little difficult to get the co-ordination right between changing the speed with your feet while working the clay with your hands. (The same is also true when learning to spin on a spinning wheel.)

Full-Size Pottery Wheels

If you’ve tried throwing on a wheel before, maybe you’ve taken some classes and, you know you’re not a quitter, I recommend you invest in a Brent EI.

Brent models may be more of a considered purchase but they outperform the cheaper ones by a mile.

They are ideal for a home studio set up and are built to last – well, basically forever.

Brand Details View

Speedball Artista Potter’s Wheel
The Perfect All-Rounder

Speed: 0–220 rpm
Wheel Head: 11″ 
Bats: 2 included.
Centering Capacity: 25 lbs
Warranty: 2-years

Read Full Review
Blick.com

Shimpo Aspire Pottery Wheel
Small and Portable

Speed: 0–230 rpm (hand-operated version)
Speed: 0–250 rpm (foot-operated version)
Wheel Head: 7″
Bats: 2 (9- 3/4″)
Centering Capacity: 20 lbs
Warranty: 5-year limited manufacturer’s warranty

Read Full Review
Blick.com


YaeTek Electric Pottery Wheel Machine
Ideal Starting Kit for New Hobbyists

Speed: 0-300 rpm
Wheel Head: 9.84”
Bats: 0
Centering Capacity: (Approx) 20 lbs

Read Full Review
Amazon

Brent Mode IE, B and C Power Wheels
The Enthusiast’s Dream Setup

Model IE
Speed: 0–240 rpm
Centering Capacity: 75 lbs.
Bats: Plast-Bat 12″
Warranty: 5-years

Models B and C
Speed: 0–240 rpm
Centering Capacity: (B)150lbs | (C)225 lbs.
Bats: Plast-Bat (B)12″ | (C)14″
Warranty: 10-years
Blick.com
Amazon

Read Full Review


Model IE
Blick.com

Click below to jump to each topic in this guide.

  • Full Product Reviews
    • Our Top Pick | The Perfect All-Rounder
    • Best Portable Pottery Wheel
    • Ideal Starting Kit for New Hobbyists
    • The Enthusiast’s Dream Setup
Working with stoneware clay on a Brent wheel. Photo by Taylor Heery.

Our Top Pick | The Perfect All-Rounder: Speedball Artista Potter’s Wheel

The Perfect All-Rounder

If like me, you are the crafty, creative type – even if you have never thrown anything before, I recommend you skip those cheap Chinese import, pottery wheels that you see all over Amazon.

Check Price on Blick.com

Speedball is a long-established US fine art materials company (1899) and their Artista pottery wheel is a quality choice. It’s suitable for all skill levels, it’s practical, portable, and more affordable than a full-size pottery wheel – and it comes with a two-year warranty.

You get two free bats with this model. Bats are extremely useful tools for removing finished pieces and leaving them to dry undisturbed. You’ll find that cheap imports don’t allow for the addition of a bat unless that is, you are prepared to drill your own holes to hold one.

Without a bat, you’d have to leave your pot on the wheel head to dry, limiting the use of your wheel, or risk damaging your piece if you try to remove it too soon.

What stands out for us about the Artista, is the amount of throwing space this pottery wheel allows you to work with.

The wheel head is 11″ but you can remove the splash pan (for safety), and the head will take a bat of 14″.

That means you are not limited to small designs. You’re limited only by the 20 lbs centering capacity which is pretty much all most people will need.

Another nice feature is that unlike the cheaper imports out there, the Artista also has a well-designed, easily removable two-part splash pan for a faster clean-up.

This pottery wheel is hand-operated – ideal if you prefer not to work with your feet, and perfect for beginners who may find their hand and foot coordination too much of an additional challenge while trying to learn to throw.

You can easily add a foot pedal later if you want. And if you are left-handed there is a left-handed version available too.

Best Portable Pottery Wheel: Shimpo Aspire Pottery Wheel

Shimpo Aspire Pottery Wheel

If you’d like something small and portable then this one is ideal.

You can it take to a pottery class or set yourself up anywhere, like your own backyard on a nice day, for example, the Aspire by Shimpo is the one to go for.

Check Price on Blick.com

It comes complete with two 9-3/4″ (alloy) bats and a removable splash pan for easy clean-up.

Again the one we have featured is hand-operated. There is also a foot-operated model but to be honest, a hand-operated pottery wheel is a better choice for a beginner.

It means you won’t have to master any hand and foot coordination awkwardness while you are learning to throw.

And just as in our top pick, with this choice you can easily add a foot pedal later if you like.

The Ideal Starting Kit for New Hobbyists: YaeTek Electric Pottery Wheel Machine

This choice is ideal if you’d like to just have a go at throwing on a pottery wheel, but don’t want to spend too much on a hobby.

Maybe you just want to have fun rather than get too serious about it.

The YaeTek is a solid choice, and for well under the $200 mark, (at the time of writing it’s under $150) it’s well worth the money.

Check Price on Amazon

You may be wondering why it costs less than our other options, so I take you through a rundown on what it doesn’t do first.

The slash pan is fixed, so although it is pretty easy to clean up, it’s not as easy as the Artista or the Aspire.

It also doesn’t come with any free bats, and, like most pottery wheels in this price range, there are no holes or pins on the wheel head to attach one.

You can, however, drill your own holes and buy a couple of bats separately. Just so you know, a bat will allow you to remove your piece while it’s drying, without risking any damage when taking it off the wheel head.

The YaeTek is foot operated. It’s also worth noting here, that hand-foot coordination can take a little while to master. That being said, the pedal is very responsive, and sooner or later you would most likely want to learn to throw with a foot pedal anyway.

One feature we really like about the YaeTek is its ability to go in both a forward and backward direction. This is great if you are left-handed but you will also find it handy for some throwing and decorating techniques.

All in all, for the price, it’s a good pottery wheel and what’s more, you don’t need to add legs or find a suitable table to position it on.

The Enthusiast’s Dream Setup: Brent Models IE, B, and C Power Wheels

Brent Model C

Regarded as the Harley Davidson of the pottery wheel. Brent pottery wheels are renowned for their power, strength, and durability.

The company has been manufacturing pottery wheels in the US for more than 40 years.

Check Price on Blick.com

Powder-coated steel legs to prevent corrosion in a moist atmosphere, along with a cast-aluminum foot pedal, a cast-aluminum wheel head, steel pins, and all-steel construction mean this baby is built to last!

Brent models feature both forward and reverse directions as well as the addition of a neutral setting – whereby the wheel can turn freely for banding and decorating. And this is a feature you just don’t get on cheaper pottery wheels.

What really sets this pottery wheel apart from the cheaper models out there, is its ability to maintain maximum torque – even with pressure and a heavy clay load.

This is because the controller automatically adjusts the wheel’s torque according to the amount of pressure that you apply to the clay. So there is no loss of torque – even when throwing a large amount of clay – and you don’t have to press the foot pedal down to compensate.

The two-piece splash pan is easily removable for a faster clean-up time.

Brent Pottery Wheels: The Difference Between Models IE, B, and C

The difference between model B and C comes down to the clay load it can handle, or to put it another way, the power behind the motor. Model B has a 1/2 HP motor and can continuously handle 150 lbs of clay, whereas model C has a 3/4 HP motor and a centering capacity of 250lbs.

For students of all levels, we recommend the IE with a reversing switch. This model has sturdy telescoping and lockable, legs which take the wheel from 13″ high when used as a tabletop wheel to 20–25″ when used on the floor.

The 1/4 HP permanent magnet DC motor and self-tensioning four-groove poly v drive belt drive will give you a smooth speed up and slow down, and a steady centering capacity of 75lbs of clay.

Brent Model IE
Brent Model IE

If you’d like to see it in action, take a look at the short video below.

As you can see from the video above, the Brent pottery wheel is a huge step up from the cheap imported pottery wheels out there.

But considering the sheer quality of their build, they are a worthwhile investment for anyone wanting to set up their own pottery studio at home.

Filed Under: Crafts

How to Use a Heat Press – Clear and Simple Instructions

September 13, 2020 by Comfy Zen Leave a Comment

To give you the best idea of how to use your heat press machine, I’ve written this easy how to use a heat press machine guide. I’ll take you through a typical process for printing a cotton t-shirt.

You can scroll straight down to any of the sections in this how-to by using the list of contents below.

Just so you know, I have put links to Amazon for any supplies you might need throughout. And if you haven’t already, check out our guide to buying a good heat press machine.

Table of Contents

  • How Do Heat Press Machines Work?
  • What Types of Transfer Can Use With a Heat Press Machine?
    • Heat Transfer Vinyl (HTV)
    • Sublimation Paper
    • Heat Transfer Paper
  • How to Use a Heat Press Machine – Instructions

How Do Heat Press Machines Work?

HIgh-Quality US made Heat Press
STAHLS HOTRONIX Auto-Open Clam from Amazon

Heat press machines basically apply heat and pressure to an image to permanently transfer it onto whatever item you are printing.

The reason it’s so popular is simply that it’s such an easy process. It’s something that can easily be done at home without stress or mess. And you’ll get a beautifully heat printed item, that’s professional enough to sell if you want to.

Though there are differences in the types of heat press machines, they all work in basically the same way. But essentially they are using the same principles you would use to iron a heat press a transfer onto fabric with a regular iron.

But really don’t try that! You’ll waste a good transfer and ruin your t-shirt.

Why’s that?

Because an iron creates hot and then cooler spots as you move it back and forth over your fabric. You’ll also be stretching the fabric a little here and there in the process as it’s just not possible to press it flat all in one go. That means your transfer won’t stick to the fabric properly. It’ll end up peeling and looking a bit smudged.

So you can see that’s less than ideal.

A heat press machine, on the other hand, applies completely even pressure at the precise temperature you set it to so that your transfer will stick and become an integral part of your fabric.

What Types of Transfer Can Use With a Heat Press Machine?

I’ll now run through the different types of transfers that you can use. Any of the links will take you to where you can get them on Amazon.

Heat Transfer Vinyl (HTV)

This is basically just a fine layer of vinyl, backed onto a carrier sheet. It’ll look something like the image to the left once the design has been cut out and the excess weeded out.

These sheets come in sets or rolls of single colors or bundles of multi-colors. You can even get a bit fancy with flock, glitter, metallic and more.

HTV is great for lettering branding and simple block color designs. You wouldn’t try to recreate a painting with it but there’s beauty in simplicity and there are no limits on your imagination.

Primology Heat Transfer Vinyl from Amazon

If this is the look you are going for, you should definitely invest in a good die cutting machine.

If you don’t know what one is, it’s a special type of printer. It cuts out designs that you create for you, using the free software included, either on your computer or through an app on your phone. You can easily upload and use your own images and fonts too.

HTV works best on cotton, polyester or cotton/polyester blends. But you can also apply it to mugs, hats, footballs, and wood.

It’ll work well on both light and darker colored fabrics.

As you can see in the image to the left, you should get instructions with each type of transfer you choose. So don’t be scared to go for that glittery one if you want to.

Sublimation Paper 

For this method, you’re going to need an inkjet printer that can take sublimation ink. If you already have one that’s great, you’ll save yourself some money because you can easily convert it to take these inks.

Sublimation paper is designed to absorb the sublimation ink and then release and transfer it when you apply heat with your heat press.

Sublimation transfers work only on 100% polyester fabrics or very high polyester content blends. But if you want to go for the vintage look, you can use a 60% poly blend.

If you’re feeling experimental, it is possible to apply a polyester coating to pre-treat any cotton or other less than ideal material.

You can also print mugs, plates and other ceramics. Aluminum also works well.

But remember there’s no white ink. That means the natural color of your fabric will show through in those areas. So this method is only suitable for white or very light-colored fabrics.

Here are a few tips:

  • Use heat resistant tape to hold your paper in place so you don’t get any ghosting effects.
  • Remember to reverse your image when you print it out.
  • You should place your image face down.
  • Sublimination requires a higher temperature to print than vinyl or heat transfer paper – around 400°F.
  • You will need a Teflon Sheet to put between whatever you are pressing and the platen.
  • And do make sure you place copy paper inside your shirt before pressing to prevent any ink from bleeding through and spoiling your shirt.

What I love about this method is that you can create beautiful full-color highly detailed designs with this method using programs like Adobe illustrator.

I’m an illustrator myself so I love the versatility of this method. You can see the kind of detail you can go into in my illustration to the right which was created in Adobe Illustrator.

My work

If you follow your instructions, you’ll get a vibrant and highly professional result, not least because when sublimation inks are printed, the image doesn’t just sit on top, it becomes integral to the fabric itself.

If you wash your sublimation printed garment inside out on a very cool wash using a mild detergent and no fabric conditioner. Your fabric will last indefinitely.

Heat Transfer Paper

This is a little different from using sublimation paper. You can use either an inkjet or laser printer.

With an inkjet printer:

  • You can print a transfer that’s suitable for cotton, polyester, and blends.
  • You can get transfer paper for dark fabrics as well as light fabrics.
  • If you print using dark transfer paper you’ll need to trim close to the edges or your image will be on a white square.
  • If you print using light transfer paper there is a clear film that will transfer as well so you should again trim close to the edges for a better finish.
  • You must use pigment-based rather than dye-based inks. Dye-based inks will wash out after a couple of washes.
  • Your print will feel slightly rougher than the other methods.

Laser printers do have an advantage in that:

  • You can print light fabrics and dark fabrics and can also get hard surface paper, which is designed especially for printing on hard surfaces so you don’t need to pre-treat them first.
  • You can buy either non-self weeding or a self weeding paper. Self weeding paper will eliminate the background for you so that you don’t need to trim around the edges of your design.
  • Your print will feel smooth.

Heat transfer paper printed shirts using either inkjet or laser printers will only give you 25 to 30 washes before the image fades and starts to crack. And that’s even if you do wash it inside out on a very cool wash using a mild detergent and no fabric conditioner.

How to Use a Heat Press Machine – Instructions

Here’s your guide to printing a t-shirt using a heat press. In this case, we’ll be using a pre-cut vinyl design on a cotton t-shirt. If you are using sublimation or heat transfer paper the temperature and times will be a little different so this method is just for vinyl.

And just so you know it doesn’t matter whether you have a swing-away or clam style heat-press, the basic principle of how they all work is much the same.

Ok, let’s begin:

  • With your heat press machine closed, turn the pressure adjustment knob to set the pressure to firm. There’s really no exact formula for this, it basically comes down to how much pressure you’d use if you were ironing it by hand.
  • Lift the lid and switch the heat press machine on.
  • Set the temperature on the digital timer to 320°F/160°C or follow the temperature instructions that come with your transfer paper.
  • Set the time – in this case, to 16 seconds.
  • Lay out your t-shirt over the thick pad on the bottom plate (platen) evenly and make sure it’s completely straight. Try to keep the shirt collar off the edge of the pad so that you don’t have an uneven surface to press. And do keep your hands away from the top plate (platen), it’ll get hot.
  • Wait for the machine to heat up to temperature. This usually takes around 6 minutes.
  • Close the lid to but don’t clamp it shut, for around 6 seconds to pre-press your shirt. This will iron out any creases and remove the moisture so that your transfer will stick to it more easily.
  • Now place your transfer onto your t-shirt lining it up evenly. You can use a T-square to help you.
  • Place a Teflon sheet over your shirt and clamp the lid shut and press for around 4 seconds this is enough to make the vinyl transfer stick to your shirt.
  • Peel the clear plastic sheet away from the back of the transfer, which should now be stuck to your shirt, and place the Teflon sheet back over the t-shirt.
  • Clamp the lid shut and press for the remaining 12 seconds.

Lift the lid and that’s it, grab yourself a coffee put your feet up, and admire your work of art while you let it cool!

Filed Under: Crafts

Best Heat Press Machine for 2022

September 13, 2020 by Comfy Zen Leave a Comment

Being able to design and print your own line of clothing and homeware is an absolute dream – and it’s way less complicated than you’d think. This is a guide, to help you find the best heat press machine out there.

You might have seen a lot of terms like clam, swing-away, platen, die-cut, sublimation, HTV, and screen-printed transfers without any explanation of what they are or what they do. It can all get a bit too much to get your brain around.

This guide will help you sail through what you need to know in order to get yourself up and running. So before you know it you’ll be ready for the fun bit – whether that’s the excitement of starting your very own clothing and homeware line or just the pure joy of seeing your own custom-made designs come to life for yourself, family, and friends.

If you want to just skip all the extra information and you just want to know which heat press machines are currently the best to go for, then they’re all right here in the table below for you.

Editor’s Award Product Scroll
Best Heat Press Machine for Under $200 TUSY Heat Press Machine
From Amazon
Read More
Best Mid Range Heat Press Machine Siser Digital Clam Heat Press
From Amazon
Read More
Best High-End Heat Press Machine STAHLS HOTRONIX Auto-Open Clam
From Amazon
Read More
Best 5 in 1 Heat Press Machine TUSY Heat Press Machine 15×15 inch Swing Away 5 in 1
From Amazon
Read More

Click to jump straight to each topic.

  • What to Look for in a Press Machine
  • The Heat Press Machines Reviewed
    • Best Heat Press Machine for Under $200
    • Best Mid Range Heat Press Machine
    • Best High End Heat Press Machine
    • Best 5 in 1 Heat Press Machine

What to Look for in a Press Machine

The main two styles of heat press machines you will notice are the clam style and the swing away style.

  • The clam style has a top lid that closes over the top of the bottom plate with a handle.
  • The swing-away style lifts horizontally and swings to the side and out of your way.

One isn’t better than another it’s purely a matter of personal preference but the clam style takes a few seconds less time to operate and saves more countertop space too – but well talk more about that in our reviews below.

We’ll now take a look at the reason they vary in price so much and what you get for your money.

The Best Heat Press Machines Reviewed

Best Heat Press Machine for Under $200: TUSY Heat Press Machine

For us, one thing that stands out about this one is that it has a handle on the bottom which you can see in the image to the left.

Now, this might seem like no big deal but actually considering all these press machines are heavy, weighing around 50lbs they can all be a little difficult to open and close for some people – and that’s nothing to do with them being Chinese imports, it’s just the nature of how they all are.

Check Price

Having this bottom handle really helps because it gives you something to grab onto with your other hand while you’re opening or closing the lid – much like if you open a book, opening it with two hands is easier than one.

Fancierstudio Heat Press

It’s also got something in common with the more expensive models including our high-end pick – and that’s a double-bar top handle. Other machines at this price point usually only have a single arm handle, just like the one you can see in the image to the right, but this sturdy wide handle is more rigid, making it more durable and easier to grip.

This will give you more stability when you’re actually using it and reduce the possibility of a wobble at that crucial moment when you’re clamping the lid shut because that’s the last thing you want when you’re trying to do precise work.

And that platen gets hot so having two handles helps keep your hands well away from the hot surface – after all, you really don’t want to burn your fingers by sticking them anywhere near while trying to prize the thing open.

So considering there isn’t much difference between the models this one is just easier to use and it doesn’t cost any more.

If you’d like to be able to print larger areas such as large adult tees rather than just smaller ones, you should go for a 15″x 15″ size which is the version we’ve chosen here. At this price point, they don’t come any larger than this but it would be unusual to need one any bigger, and don’t worry, it’s not too big, you’ll also be able to fit toddler tees on it too.

However, if you know you’ll only need to print smaller areas this won’t matter too much to you and you might prefer to go for a heat press machine with a smaller heat platen like the one above right and save a few bucks.

In case you are wondering what you’ll be able to print with this machine, you’ll be able to print more than just t-shirts here are a few examples of things you’ll be able to print:

  • Sweatshirts, and other garments,
  • Tote bags,
  • Mouse mats,
  • Banners,
  • Throw pillows and much more.

The downside to this machine, though, is that it can’t print mugs or caps and that’s because you would need mug and cap press attachments for that. If that’s something you’d want to do, scroll down for our 5-in-1 review.

If you’d like to know what printing materials you can use with this machine, here’s a quick list, but if you don’t know what any of these terms mean yet don’t worry we explain all of that in our guide to using a heat press:

  • Pre-cut heat transfer vinyl (HTV),
  • Sublimation paper
  • Heat transfer paper
  • Embroidered patches
  • Screen printed transfers, otherwise known as plastisol transfers.

The machine will even handle rhinestones well. You simply use light pressure and a piece of cardboard to prevent the glue from sticking anywhere other than to the back of the stones and the fabric you’re sticking them to.

This heat press is a clam style heat press which is one of the two main styles you’ll see out there, the other one being the swing-away style.

Now the difference between them is that with the clam style, the lid which is not actually attached to the bottom platen, lifts up, much like a clamshell, while the swing-away style lifts horizontally, and then you swing it to the left away from your workspace.

At this price point, the swing-away style is more often sold as a bundle with other attachments such as in the 5 in-1 in our review below.

There are advantages to each, but if your focus is just to pint t-shirts, etc. and you’re not going to need all the attachments to print mugs hats, and plates, you’ll find the clam style much better as it’s such a great little space saver taking up much less room on your work table than the swing-away.

Another advantage is that it’ll also take less time to operate since you don’t have to swing the heat platen away from your work each time you make a transfer, and then back again for your next one. Admittedly you’ll only save yourself a few seconds but these seconds start to add up when you have quite a few tees, to work your way through.

Now for the last bit, let me just run through some of the extra things that I’ll need to say about the other features this machine has. I won’t go into too much detail as this is pretty much standard for all of them.

First of all, it has an LCD control panel on which you can set the time and temperature that you need. The temperature ranges between 0 and 500 degrees and the time range are 0 to 999 seconds. The required pressure is set by turning the pressure adjustment knob.

Here is a short marketing video about it so you can see it in action.

What We Like:

  • The Handles Provide Stability and Support | Unlike its competitors, the TUSY Heat Press Machine has a handle on the bottom which gives you added stability and support when lifting the lid. There is also a double-bar top handle which provides stability and support when closing the lid.
  • Low Price | It’s very affordable in comparison with higher-end machines making it ideal for beginners, hobbyists, or new small business ventures.
  • Easy to Operate | This machine works in just the same way as the much higher-end models without the high price tag. You still get an LCD panel with a timer that lets you set the time and temperature that you need, and the pressure is set by turning the pressure adjustment knob. The clock time is spot on for this machine and it only takes around 6 minutes to heat up to full temperature, that’s pretty quick. That’s basically it, and just so you know, your sublimation, or heat transfer paper, etc should come with instructions on the settings you will need.

Best Mid Range Heat Press Machine: Siser Digital Clam Heat Press

Siser is a highly respected Italian company that has a base in North America.

If the name may sound familiar to you, that’s because they are manufacturers of high-quality, cuttable heat transfer vinyl, and other printable heat transfer vinyl media.

Check Price

The Siser Digital Clam Press is a step up from the TUSY Heat Press Machine we’ve just looked at, in terms of precision and quality and although it does cost more than our cheaper option, it’s a high-quality machine, it costs much less than Stahls Hotronix, and it will give you years of use.

It’s super easy to operate with its digital time and temperature readout that will let you know by bleeping when your transfer is done.

For even edge-to-edge pressure, it has an over-the-center pressure adjustment. The upper flotational platen isn’t rigid, but don’t worry it’s designed that way to for accurate placement and it will provide a flat, even press every time.

The upper heating element has a non-stick coating to prevent your transfers from getting stuck and cast tubular heating elements are placed every 2 inches apart to eliminate any cold spots. So your transfer will look perfect every time.

Key Features:

  • It has cast-in tubular heating elements spaced every 2 inches to eliminate cold spots.
  • It features a high-quality platinum RTD (Resistance Temperature Detectors) heat sensor.
  • The upper heat platen has a non-stick coating.
  • The upper flotational heat platen is designed for the ultimate even press.

Best High-End Heat Press Machine: STAHLS HOTRONIX Auto-Open Clam

The real difference between this one and all the cheap Chinese imports out there is that this machine has a much higher standard of quality control in the factory it’s made in because it’s made in the US.

It’s basically a huge step up, as you’d expect when comparing US-made stuff with Chinese manufacturers who provide the same cheaply made parts to multiple brands.

Check Price

The only issue with that though, is there’s a big step up in price too. That’s why this one is more of a high-end pick. This one is better, but it sure reflects that in its price tag.

Now I’m not saying that the cheaper Chinese import machines are not well made, most are pretty durable and will get the job done for you, no problem. But if something were to go wrong, there’s only Amazon’s returns policy that you’ve got to depend on. With this one, however, you’ve got the backup of a lifetime warranty on the machine’s heating block, a 1-year warranty for parts and labor, and excellent technical support.

This heat press is also a clam-style machine, it works in the same way as the TUSY machine we have looked at. At the risk of repeating myself, this style is much better for saving you counter space, and it takes (admittedly just a few) seconds less time to operate since you don’t have to swing the heat platen away from your work each time you make a transfer, and then back again for your next one.

When it comes to the printing side of it, the thing that’s going to matter most to you after you’ve spent all that time carefully preparing your artwork is that it transfers evenly all over. I mean the last thing you want is it peeling up at the corners or looking faded out in places and ruining your t-shirt or whatever fabric you’re printing on in the process too.

This can happen in other machines if the platens don’t meet evenly so they end up pinching in places, giving you uneven pressure, or if the heat platen develops cooler spots so that there are areas where there isn’t enough heat for the transfer to take properly.

With this machine, they’ve thought of a couple of clever ways to get around this and prevent it from happening. Firstly, they’ve given their heat press a patented over-the-center pressure adjustment, and that together with a floatation top platen that adjusts itself as the lid closes, will give you, edge-to-edge heat and pressure no matter how thick the surface you are printing.

Secondly, they’ve eliminated the chance that any cold spots will develop and ruin your transfer, by adding cast-in tubular heating spaced at 2″ apart. This increases the thermal conductivity of the heat platen. And that means every part of it stays just at the temperature you need.

And what particularly impressed us is the accurate digital pressure readout on the console. This takes all the guesswork out of medium or light pressure etc.

So if you’re a beginner and have the budget, this machine will give you the absolute best results every time.

The defining factor about this machine for me though, is how effortless it is to open and close.

You see with other machines the action of repeatedly opening and closing the top platen after multiple prints can get pretty tiring on your shoulder and arm. After a while, they’re really going to start to ache.

This machine’s going to take all the hard work (and weight) out of heat printing for you. It has a smooth auto-opening action – and means it will do just that! It’ll open all by itself when the time’s up (and give you a satisfying pop in the process).

With a printing area of 16″ by 20″ it’s big enough to heat print much larger areas than most. Giving you a wide range of design size possibilities.

The bottom plate is straightforward to remove and replace with a different size when you need to – no tools are required, and it takes just seconds. This is something you’ll find extremely useful as your orders start to increase.

Lastly, I need to mention a little feature that’ll make a big difference in how much room you’ll have to work with when you’re preparing your transfer. Where other machines only open to around 45° to 50°, the top platen on this machine opens to 65°. Now that’s significantly wider than other machines and those extra degrees are important.

You see, the most time-consuming bit of the actual printing process is, more often than not, simply the time it takes you to lay your fabric out and accurately place your transfer into position. Rather than actually waiting for the timer to count down. So the last thing you need is to have to negotiate around a hot platen that’s a little too close to your hands for comfort. Those extra degrees will give you just that. A bit more space to work with which will help speed up your workflow – as well as make sure you don’t end up with any unwanted burns anywhere.

Now for the feature that I need to mention which pretty much comes as standard for all these machines – the digital time and temperature readout that lets you set the time and temperature that you need – and just so you know, it’s spot on with this machine. The pressure is set by turning the over-the-center pressure adjustment knob.

If you’re wondering what this machine will print, it’s pretty much standard to all of them. If you missed the list, scroll up to see it here. The only exception with this one (and our top pick) is that it doesn’t print caps, plates, or mugs, etc., Although there is a completely separate cap heat press machine designed by Hotronix specifically just for that purpose.

Weight: 96lbs

What We Like:

  • Made in the US | Unlike the cheaper Chinese imports, with this machine, you are getting a quality heated press machine made in the US. You also get the backup of a lifetime warranty on the machine’s heating element and a 1-year warranty for parts and labor. You also get great technical support.
  • Smooth Auto Opening | It has an easy open-close action, helped by a gas spring that gives the machine a smooth shock auto opening, so you’ll never have to struggle to open or close it for that matter.
  • Patented Over-the-Center Pressure Adjustment | Together with the floating action of the top platen that adjusts itself as the lid closes, this machine will ensure that you get even, edge-to-edge heat and pressure.
  • Built to Last | The Hotronix Maxx has a scratch-resistant, baked-on powder coat finish. It also has a non-stick coated heat platen and it complies with the strictest US safety standards.
  • Cast-in Tubular Heating | Set at 2″ apart, this will ensure you never get any cool spots.

Check the latest price on Amazon.

Best 5 in 1 Heat Press Machine: TUSY Heat Press Machine 15×15 inch Swing Away 5 in 1

TUSY Heat Press Machine 15×15 inch Swing Away 5 in 1

If you like the idea of having the option of printing more than just the regular 2d stuff, and you’d like to print on caps, cups, and plates then this isn’t possible with our top pick because it doesn’t have any of the attachments that you’d need to do that.

Check Price

These 5-in-1 heat press machines come with four different attachments. These attachments actually adapt the basic t-shirt press part of the machine into a completely different cap, cup, or plate heat press machine – depending on which one you want to use.

You can see in the image above, that the main top and bottom platens have been switched out for the hat press attachment.

Now, here’s the thing: it’d cost just the same as this five-in-one machine if you were to get the first pick in this guide and a separate mug machine for example. That, of course, would mean missing out on the other attachments as well. This makes this five-in-one machine far more cost-efficient if you’re a crafter that’s going to actually use them.

You can also say that it’s nice having an all-in-one machine rather than two machines. It’s a little more space-saving at the very least.

The difference between, the TUSY 5 in 1 heat press and others out there is that this one comes in a 15″ by 15″ platen size. Now what this means is you’re not just restricted to having to make do with the one size that all the other 5 in 1’s offer.

You see most of these 5-in-1 heat press machines only come with a 12″ by 15″ platen for the regular t-shirt printing side of things and not this larger size. This size is usually only an option with stand-alone machines. So basically, with most of the 5 in 1 machines out there, what you’re actually doing is sacrificing a few inches that you might need to get those extra attachments.

The one defining thing that you’ll notice about this and all the other 5 in 1 machines out there, is that it’s a swing-away style – rather than the clam style that was our top pick.

The reason for this is a purely practical one, and that’s because the design of the swing-away machine is what actually makes it possible to partially dismantle and reassemble the machine with whichever extra attachment you want to use.

But don’t worry, there’s no compromise on quality here, one style isn’t better than another. It’s just that with a stand-alone machine where you’re using just the basic platen over and over again, it’s a little quicker to use a clam. And since you’re not swinging the platen out and away from the machine and you don’t have any attachments, you’re going to save yourself some counter space too.

With this one, you are going to need a bit of worktop space to use it. And, of course, you’ll need room for the additional attachments too. But if your workspace is a bit limited, remember you will only be using one attachment at a time. So it’s going to be much more economical with your space than having lots of different machines.

The only downside to adapting the machine rather than having several separate ones is that with the exception of the cup press, which pretty much just pugs in as-is, you’ll need a cross-head screwdriver, to adapt the machine and fix the other attachments to it.

But don’t worry if you don’t know what a cross-head screwdriver even looks like, they’re the ones that look like an ” x” on the end – you know, the really common standard type you see around. Anyway, it’s really very easy and straightforward to assemble the different attachments.

Also, it’s worth me mentioning again, that these machines that come with the extra attachments are all pretty similar, and that’s because, like our top pick, they are imports from China. Don’t let that put you off, because that doesn’t mean they’re not durable. If you’re a hobbyist or are even starting a small business, they work pretty darn well, and they’re affordable simply because you do get a lot for your money.

One thing that impresses me about TUSY’s new 15″ 5 in-1 heat press machine is that they’ve given it a thicker double-layer mat. The single black dense foam one that comes with their other models is a little too thin in my opinion so it could curl or may not stay put as easily while you are placing your fabric over it. That said, it’s no big deal to replace it s, they don’t cost much and if it does start to degrade over time you can easily get a replacement mat here if you need it.

But it’s just good to know that with the new version, TUSY has thought about it and given the mat a bit of an upgrade.

What We Like:

  • Good Build Quality | The TUSY has a lot more metal parts than plastic ones. That’s something that is not common to all of them. That vertical bar that supports the top platen is quite often just plastic covering an inner metal tube. Which means it can be prone to splitting. The TUSY has a much stronger all-metal bar making it way more durable.
  • Low Price | It’s very affordable in comparison with higher-end machines making it ideal for beginners, hobbyists, or new small business ventures.
  • Easy to Operate | This machine will give you the same results as a high-end one without the high price tag. The attachments are all straightforward and easy to attach and, of course, you still get an LCD panel with a timer that lets you set the time and temperature that you need, and the pressure is set by turning the pressure adjustment knob. It only takes around 6 minutes to heat up to full temperature, that’s pretty quick.


We hope this review of the best heat press machines has been helpful.

If there’s anything that you think we’ve missed, or if you have any questions about anything, then let us know down in the comments below.

Filed Under: Crafts

Best Macrame Kits (for Easy Chic Projects You’ll Love)

September 3, 2020 by Comfy Zen 2 Comments

If you haven’t tried macrame before, and you like the idea of creating something a little boho chic and contemporary with fiber, you absolutely should try macrame, you will love it! There isn’t a huge expensive outlay or a ton of equipment to buy, just to get going. And you can make something you’ll actually be proud of – your very first try.

There’s a lot of choices out there so we looked at more than 30 macrame kits and narrowed our search down to find the best macrame kits in our four main categories.

Type of Macrame Kit Top Pick
Best Macrame Plant Hanger Kits
Macrame Plant Hanger Kit by ReformFibers
Best Wall Hanging Kits
Beginner macrame KIT by CordPlusQuartz
Best Home Decor Macrame Kits
Macrame Hanging Shelf Kit by KnottyCotton
Best Mini Macrame Kits
Macrame Keychain Kit by KnottyRopeCollection

Table of Contents

Macrame Plant Hanger Kit by ReformFibers from Etsy
  • The Best Macrame Kits Reviewed
    • Macrame Plant Hanger Kits
    • Wall Hanging Kits
    • Home Decor Macrame Kits
    • Mini Macrame Kits
  • Other Worthy Mentions
  • Frequently Asked Questions

Macrame Plant Hanger Kit by ReformFibers

This kit makes an absolutely stunning (approx 58″) plant hanger. There’s nothing 70s about this one. It’s completely contemporary-modern and high-end chic.

To be honest, you can cheat with this one if you really want to (we promise won’t tell anyone). There’s an option to buy the macrame plant hanger ready-made by the skillful hands of shop owner Elsie Goodwin.

The macrame kit comes with over 100 feet of 100% cotton rope – pre-cut to the correct lengths that you will need to make your project.

The kit also includes a metal ring, an easy-to-follow pattern, and a handy Beginners Knot Guide – with photos, and FAQs.

Check Price on Etsy

Macrame Plant Hanger Kit by ReformFibers

We couldn’t resist showing you another of Elsie’s macrame kits.

She’s a very talented fiber artist who holds her own macrame workshops.

Again, you can buy the kit with pre-measured and cut lengths of 100% cotton cord and the same accessories as above, or cheat and get one exquisitely handmade by the fiber artist herself, like the ones you see in the photo left – and then choose another kit to tackle yourself.

Check Price on Etsy

DIY Macrame Kit by Macramebyheydesign

If you want a splash of color this kit is a fabulous choice. It comes in a choice of 5 different shades. The kit includes pre-measured macrame rope, a wooden ring, and a link for an easy-to-follow instruction video.

Check Price on Etsy

Macrame Plant Hanger Kit by KnottyCottons

This kit is super affordable and a great choice for a beginner.

The kit includes:

  • 1, S-hook handmade specifically for this kit.
  • A wooden ring, also handmade for the kit.
  • Two lengths of pre-measured rope, so you can get knotting as soon as your kit arrives.
Check Price on Etsy

DIY Macrame Plant Hanger Kit by TysKnots

Another great way to learn the basic macrame knots. This plant hanger kit will hold a 4-8″ inch pot and hangs around 3.5ft long when completed.

This kit comes with:

  • 100% 3-strand twisted, cotton rope, pre-measured, and cut.
  • 1, brass ring.
  • One plant hanger pattern
    and a macrame tutorial booklet.
Check Price on Etsy

Wall Hanging Kits: Beginner macrame KIT by CordPlusQuartz

What particularly we love about this 12″ kit – apart from how cute the design is, is that there are 15 gorgeous colors to choose from, so you can make a macrame wall hanging that will complement or contrast your decor.

The kit includes:

  • A 19-page pattern book with step-by-step instructions and pictures.
  • Beginner knot guide with step-by-step picture instructions to the 8 basic macrame knots.
  • 1, 12″ wooden dowel and pre-cut 100%. cotton cord in the color of your choice.
Check Price on Etsy

Small Beginner Wall Hanging Macrame Kit by DisorderlyStitches

This sweet little beginner macrame kit even comes with an extra little gift such as a puzzle sheet, tea, or candy, etc. to put a smile in your heart.

The kit comes with:

  • 60m of 4-strand, 3mm macrame rope.
  • A 12″ dowel and string for hanging.
  • A 10-page full-color pattern booklet.
  • A helpful 12-minute instructional video with text instructions.

And support! If you get stuck you can message the seller.

Check Price on Etsy

Let’s Stay Home and Macrame by DesignbyMads

This cute little wall hanging is ideal if you are new to macrame. It comes with a wooden dowel, cotton rope, a small cotton rope to hang your wall hanging, when complete, and a knot guide. You will also get an emailed video tutorial.

Check Price on Etsy

Home Decor Macrame Kits

Macrame Hanging Shelf Kit by Knotty Cotton

This Scandinavian boho-chic macrame shelf will create a stunning focal point in any room.

The kit comes complete with everything you need for your macrame project, including a handmade S hook, wood craft ring, and cotton rope.

Plus you get a (15.5 – 16-inch) piece of pine with an adorable design – as you can to the left. The wooden shelf is pre-drilled with holes for hanging.

The finished piece will be around 2.5 – 3 ft long but if you need a customized length, you can just message the seller.

Check Price on Etsy

Best Mini Macrame Kits: Macrame Keychain Kit by KnottyRopeCollection

Macrame Keychain Kit by KnottyRopeCollection

This macrame kit includes everything you need, including a video tutorial, to make this adorable macrame keychain.

This sweet little kit contains:

  • Macrame rope – in a wide choice of colors.
  • A wooden bead and antique brass lobster clasp.
  • Plus a link to a private YouTube video tutorial that will be emailed to you on purchase.
Check Price on Etsy

DIY Macrame Kit, Keychain Kit by HiddenBohemian

This little keychain, like our last, would make a sweet gift for someone – so you might want to buy two. With a choice of clasps and 5 color options to choose from, this is another big hit for us.

This macrame keychain kit contains:

  • 3 strands of 4-5mm cotton string.
  • 1 lobster clasp out of a choice of 3.
  • Instructions include one extra bonus design.
Check Price on Etsy

DIY Macrame Rainbow Kit by HiddenBohemian

Make your own sweet little macrame rainbows with this adorable kit. Another cute design from HiddenBohemian. It comes in a choice of different color pallets with names like summer, storm clouds, and mid-century (you know I love everything mid-century)

Check Price on Etsy

DIY Mini Macrame Plant Hanger Kit

We are back to plant hangers with this macrame kit, but this one is a mini kit version.

It comes with all the pre-cut rope you need, a wooden ring, a digital plant hanger pattern, and a digital knot guide.

Check Price on Etsy

Other Worthy Mentions

Home & Crafts Macrame Kit

This fabulous kit comes with 4 designs to choose from – and enough cord to make any 2 items from the included booklet.

Check Price on Amazon

Filed Under: Crafts

5 (Beautiful) Best Looms for Beginners

August 29, 2020 by Comfy Zen Leave a Comment

Lap Heddle Loom by Craft Boutique NYC on Etsy

Weaving is a fun and rewarding hobby that allows you to create beautiful textiles using a variety of techniques and materials. If you’re new to weaving, it can be overwhelming trying to figure out which tools and equipment you need to get started. One of the most important pieces of equipment for a weaver is the loom. In this post, we’ll take a look at some of the best weaving looms for beginners.

None of the looms we tried were costly so they would make beautiful gifts- in fact, they are perfect for anyone who would just like to try their hand at weaving.

But above all, they are well made. They are not going to fall apart – because that’s the last thing you want when you’re halfway through a project you’ve lovingly put so much work into.

There’s a lot of choices out there, so we looked at more than 20 looms that were suitable for a beginner and narrowed our research down to our top 5 picks. Our recommendations have the perfect combination of design quality, durability, as well as aesthetic charm.

So, whichever one you choose, you will treasure, and find an absolute pleasure to use.

Our Top Choice
Lap Heddle Loom by Craft Boutique NYC
Also Great
Frame Loom Weaving Kit Blush by Oake&Ashe
Best Pocket Loom
Pocket Weaving Loom Kit by Amubleu
Best Tapestry Loom
Tapestry Loom by Stephen Willette
Also Consider
Circular Weaving 2-Loom Set by CraftSanity
Circular Weaving 3-Loom Set by CraftSanity

Our Top Choice

Lap Heddle Loom by Craft Boutique NYC

This beautiful handmade tapestry loom is ideal for a beginner.

But it’s also not going to hold you back as you develop your weaving skills to become an experienced fiber artist.

Check Price on Etsy

Unlike some looms, that come with just a yarn needle, this one has a heddle bar – though it’s much simpler in design than the heddles you’ll find on traditional rigid heddle looms.

But don’t worry if you don’t even know what one is yet, I’ll explain. It’s that separate bar with notches that you can see at the bottom of the picture below.

You simply thread your warp threads through the notches.

Twist the bar one way, and one set of warp threads lifts to form a shed (the area where the shuttle stick passes back and forth). Twist it the opposite way and the shed closes and alternative warp threads lift to form a second shed.

It’s such a simple idea, it just makes weaving in and out of the warp threads so much easier.

With this lap loom, you also get two shuttle sticks, an adorable wooden loom comb (to comb your weft yarns into place) and the kit even includes a bar for hanging your first piece.

Made from 100% authentic beech wood, which is known for its aesthetic colors and durability, this weaving loom has a high-end contemporary look and feel.


Although no yarn is included with this option, there is an add-on option to purchase a 50g ball of white cotton warping thread. You can see it on the loom in the photo above.

The frame loom we’ve featured here is the 14″ by 16″ lap loom. But there are two additional sizes to choose from. See below.

  • Lap Loom 14 inches x 16 inches
  • Large Weaving Loom – 19.6 inches x 19.6 inches
  • XXL Loom – 35 inches x 34 inches

You can visit the Craft Boutique NYC store here.

Also Great

Frame Loom Weaving Kit Blush by Oake&Ashe

This adorable kit includes everything you need to get started.

It even comes with a nice fabric tote bag to keep everything together in one place – making it an ideal choice to take with you when you want to weave on the go.

Check Price on Etsy

The kit is perfectly designed for a beginner. But you can use it to make some beautiful pieces.

A good kit is always a great choice for a beginner. It means you don’t have to spend time researching and ordering everything you need in order to get started, and you’ll already know exactly which supplies to buy when you’ve used everything up in your kit. (We’ve written our soap-making kit guide and our guide to candle-making kits for that reason).

The Oake&Ashe loom is very easy to assemble and super easy to warp and set up making it one of the best looms for beginners.

The frame comes with a set of beams that have strong plastic hooked teeth to prevent the yarn from slipping off and to accurately space your warp threads.

The loom we have featured here is the 10″ by 10″ lap loom and because there’s no external frame around it, this space-saving design means you can create weavings right up to those dimensions.

And if you want a larger loom? That’s no problem, there are several other sizes to choose from. I’ll link them for you below.

With this kit, you don’t get a heddle bar like the Craft Boutique NYC’s one we have just looked at, but you do get a pickup stick.

To use a pickup stick, you thread it in and out of your warp threads. Then with the pickup stick laying flat, you weave your yarn in and out of the warp threads, as you would normally, using the stick shuttle or weaving needle provided.

In the opposite direction, you simply turn the pickup stick vertically to automatically lift some of the warp threads. This will create a shed for your stick shuttle or weaving needle to pass straight through. (Pickup sticks are also commonly used to make more complicated weave patterns in weaving.)

The Blush, Beige, Ash, & Taupe option

The frame of this kit is beautifully made from sustainably sourced hard maple wood and the kit also includes:

  • Beginners’ instructions
  • Small scissors
  • 800 yds cone of warp yarn
  • 4 balls of 100% wool yarn – in Blush, Beige, Ash, and Taupe, but there is also a grey option if you prefer.
  • 1ozs of wool roving
  • A maple wood weaving comb and a 10″ hanging rod.

Best Pocket Loom

Pocket Weaving Loom Kit by Amuble

We couldn’t resist adding this little pocket loom to our list of the best looms for beginners. It will give you a weaving of just 6″ by 4″.

It’s ideal for making small, quick projects that you can turn into, cute bookmarks, jewelry, mini wall art, pouches for glasses, or makeup, etc. or you could make patchwork pieces to sew together.

Check Price on Etsy

The great thing is, that you can practice mixing colors and yarns and create mini (sample) patterns before you apply them to a large-scale project.

So even when you are hooked on weaving (and you will be,) and have years of experience as a fiber artist, you will still want to use this little kit to make samples for your bigger weaving projects.

The fact that it also comes with a mini muslin storage bag also makes this an ideal travel loom to take with you to the beach etc.

The loom itself is made from wood and measures 4″ x 6.75″ giving you a finished cloth of 4 inches by 6 inches.

The kit also comes with:

  • 1 weaving needle made from a thorn from a honey locust tree. ( I just love the names of trees.)
  • 2 mini skeins of hand-dyed DK weight yarn. In a choice of colors from pinks, oranges, and golds to greens, blues, greys, and black. That’s about 20 grams in total and enough yarn for your first project.
  • 1 muslin bag to keep your supplies together when you travel
  • And instructions to help get you started.

Check the price of the Pocket Weaving Loom at amubleu’s store on Etsy.

Tapestry Loom: Tapestry Loom by StephenWillette

This tapestry loom by Stephen Willette will inspire you to make some beautifully rustic or traditional pieces, the loom itself is practically a work of art.

Check Price

Made from solid cherry, this tapestry weaving loom has an original design that takes its inspiration from the best features of the Tapestry Loom, Navajo Loom, and Sprang Loom.

Where the design of this one really stands out, is that you choose your own natural sticks for the top and bottom of the loom.

They then become part of the weaving process. The loom will allow for a piece to be woven up to 21.5″ in length and 13″ wide. But if you have longer sticks, you can make weavings much wider than this as it’s possible to weave outside the loom.

When the tapestry is finished, you simply remove the pegs and you are ready to hang your weaving.

Natural sticks are available, at Stephen Willette’s store both with holes drilled (approximately 1/2″ apart) and without holes.

The loom folds to a compact size of 28″ tall x 16″ wide x 4″ deep and the handle makes it great for travel or taking with you to a weaving class.

No shuttle, shed stick, or tapestry needle comes with it but they are all available from the store.

Vsit the Stephen Willette store.

Also Consider

Circular Weaving 2 or 3-Loom Set by CraftSanity

If you’d like to try something a little different, how about this adorable set of 2 or 3 circular looms?

You can make wall art, placemats, coasters, hat or bag components, or make decorative embellishments to sew onto home furnishings or garments, etc.

Check Price on Etsy

They are just as easy for a beginner as a regular frame or tapestry loom. But the fiber art you’ll create will have anyone believe you are an experienced fiber artist.

The set includes:

  • One, 3 1/4″ diameter scalloped loom
  • One 7″ diameter scalloped loom
  • One 11″ diameter scalloped loom (this item is in the set of 3 only).
  • Full-color instructions for basic weaving in the round and a warping diagram for you to follow – making it a great choice when choosing the best looms for beginners.
  • One metal yarn needle.

A nice touch that will only find from a friendly small independent business is that for $5 (or less for the 2 sets) you can even, choose to have your looms warped for you – so when they arrive they are ready to go.

Other Worthy Mentions

The Turtle Travel Loom

This one is so simple to put together. It comprises just 3 parts that slide together.

  • Comes with two 8″ shuttle sticks and a shed stick.
  • Perfect for kids, students, and weaving or fiber art classes.
  • Provides a good-sized weaving area of 12″ by 12″.
Check Price

Weaving Starter Kit for Beginners

This is an Ashford weaving loom. Ashford makes very high-quality spinning wheels but also one of the best looms for beginners.

The kit also includes:

  • 1 Ashford weaving needle.
  • Ashford Tekapo 12ply yarn.
  • Ashford wool roving and a dowel for hanging.
  • Creates a finished size of 9.5″ x 14.25″ excluding the 8″ fringe.
Check Price

Deluxe Standing Weaving Frame Loom

This is OakeandAshe’s 20″ deluxe weaving frame.

  • It’s made with hard maple beams and has the same hard plastic teeth we’ve already mentioned above.
  • Incorporates two pivoting kick-stand feet in the design.
  • Includes a stick shuttle, pickup stick, and weaving needle. 
Check Price

3-inch Square Small Loom

These sweet little 3″ looms are laser cut from 1/4″ thick Maple wood with an MDF core.

  • Comes as a set of 3 or 6, 3″ square mini looms.
  • A great budget option and they would make lovely crafty gifts for creative kids.
Check Price

In conclusion, there are many great weaving looms on the market for beginners. Whatever you choose, be sure to consider factors like size, materials, and accessories when making your decision.

Filed Under: Crafts

  • Go to page 1
  • Go to page 2
  • Go to page 3
  • Go to Next Page »

Primary Sidebar

Featured Posts

Are Womb Chairs Overrated?

10 Interior Design Trends to Suit your Personality: Take Our Quiz

Do Dining Chairs Have to Match the Table?

The Top Velvet Sofas for a Chic and Comfortable Living Space

Easy Coffee Cinnamon & Honey Soap Recipe – Melt & Pour

Super-Easy Homemade Honey & Oatmeal Soap Recipe – Melt and Pour

Free Macrame Feather Pattern with Video

Recent Posts

Archives

Footer

Disclaimer

Neither Comfy Zen nor any of its employees shall be held liable for any harm to persons or property that results from use of the information described and/or contained herein.

All images on this website belong to their respective owners. If any graphic or image on this site is under your own copyright, then please contact us and we will remove it promptly.

Comfy Zen is a participant in the Amazon Services LLC Associates Program, an affiliate advertising program designed to provide a means for sites to earn advertising fees by advertising and linking to amazon.com.

We also participate in the Shareasale, Awin and Impact affiliate advertising programs, designed to provide a means for sites to earn advertising fees by advertising and linking to participating websites.

Copyright © 2024 · Comfy Zen

  • Privacy Policy
  • Terms of Service
  • Contact